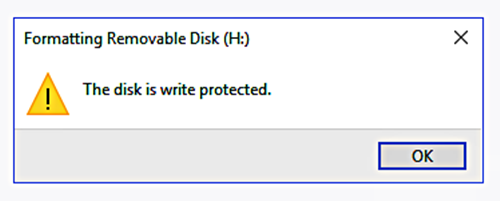
A Write-Protected drive is generally locked in read-only mode. In this situation, you can only view the files but can copy new files, move files, or delete files to and from this drive. The issue can happen both on hardware and software levels.
There could be many reasons for this, and most are on the software level. In some cases, bad sectors, drive corruption, and failed memory sectors can result in this problem. However, there can be problems on the operating system level, which we are going to try to fix using the command line and the registry editor. So, without talking much about this, let’s go directly to the fixes.
1. The Basic Steps
Some of the basic steps before you proceed for the advanced fixes are trying to use the drive in another computer, installing the drive in another USB port. Check for the physical lock buttons on the flash drive or the SD card. If it’s an external SSD or HDD, make sure it is connected properly and the LED indicator (if available) is turning on. Check if the drive has any physical damage as well.
2. Check and remove the readonly attribute
This attribute is generally forced by the operating system when it sees any file corruption. It does that to prevent further damage to the system. Sometimes, improper ejections can also result in the automatic attribution of read-only. Malware and a failing drive can also do that. However, we can easily remove this attribute using the command line. Let’s see how to do that.
- Press Win + X and select Command Prompt (Admin) or Terminal (Admin).
- Type diskpart and press Enter
- Type list disk and press Enter
- Identify your disk number (be careful to select the correct one)
- Type select Disk X (X is the disk number)
- Type attributes disk clear readonly and press Enter
- Type exit to close Diskpart
Here is a guide on how to do it:
3. Modify Registry Editor (Windows)
Windows has an inbuilt registry key that can enable write protection on removable drives like SD cards, flash drives, and external SSDs as well.
This registry is controlled at this path:
HKEY_LOCAL_MACHINE\SYSTEM\CurrentControlSet\Control\StorageDevicePolicies
If the WriteProtect entry is set to 1, Windows will treat every removable drive as read-only. So, in this step, we are going to see if that is the case with your drive and system and will fix it if it is.
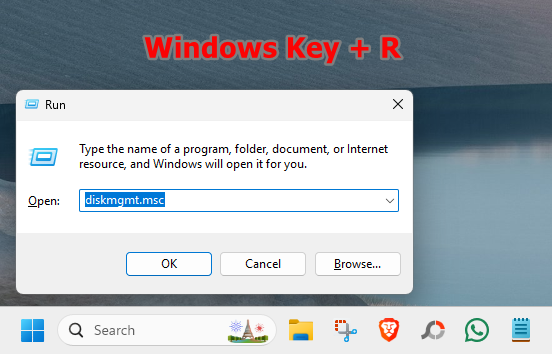
- Press Win + R, type regedit, and press Enter
- Navigate to HKEY_LOCAL_MACHINE\SYSTEM\CurrentControlSet\Control\StorageDevicePolicies
- If the key exists, double-click “WriteProtect” and change the value to 0
- If the key doesn’t exist, right-click Control, select New > Key, and name it StorageDevicePolicies.
- Right-click inside the new key, select New > DWORD (32-bit), name it WriteProtect, and set its value to 0.
Below is the detailed video guide for the whole process.
With this Registry entry, your drive should be able to get your drive being able write the data. If not, proceed to the next step.
4. Format the Disk (will erase all data)
Sometimes, your drive will be available in the file explorer as a read-only drive but normal in the disk management. In this case, if you can, you can format the drive to check if that removes the restriction. Yes, all the data will be deleted, but it is worth trying if you can risk the stored data for your drive to work normally.
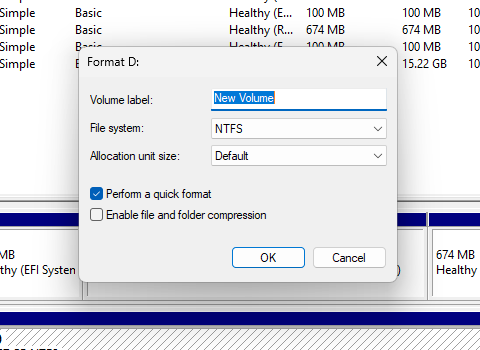
- Open Disk Management. Press Windows Key + R and enter diskmgmt.msc.
- Right-click on your disk and select “Format“
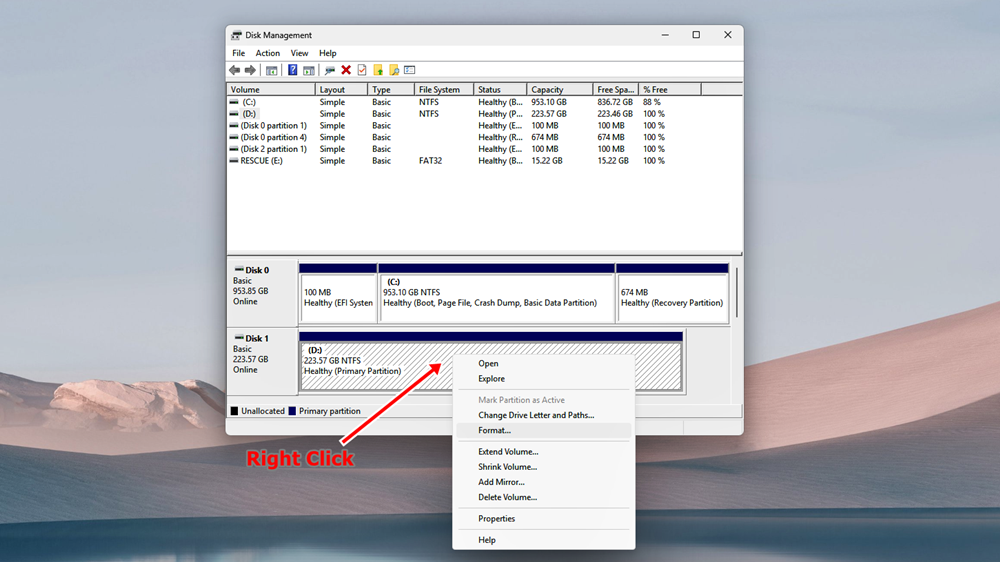
- Uncheck “Read-only” if available and proceed with formatting
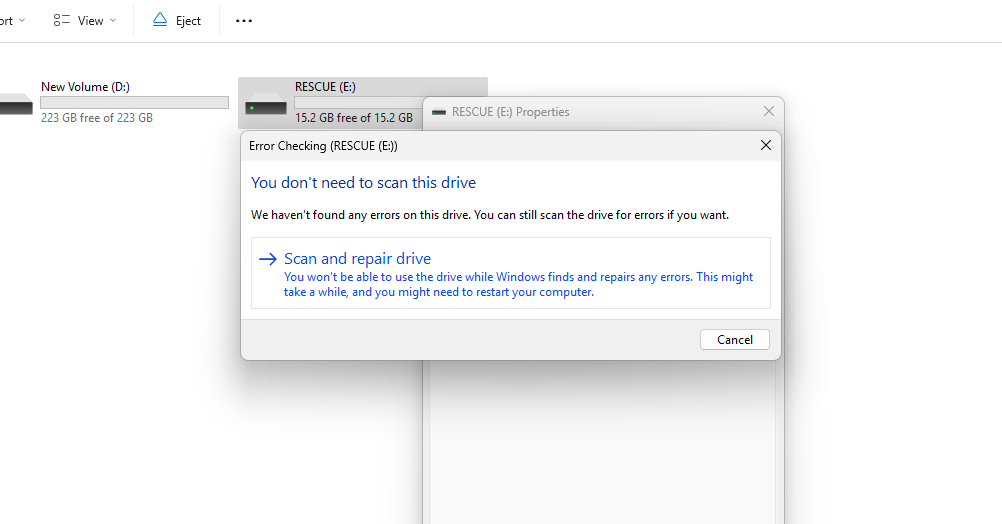
5. Check for Corruption
You can simply run a Windows Defender anti-virus scan or use any third-party anti-virus tool that you prefer. To check your drive for errors or corruptions, you can simply use the File Explorer. Here are the steps to follow.
- Open the File Explorer and locate your drive.
- Right-click the drive and click Properties or Show More Options>Properties

- Inside the Properties menu, choose the Tools tab and click Check under the error checking section.
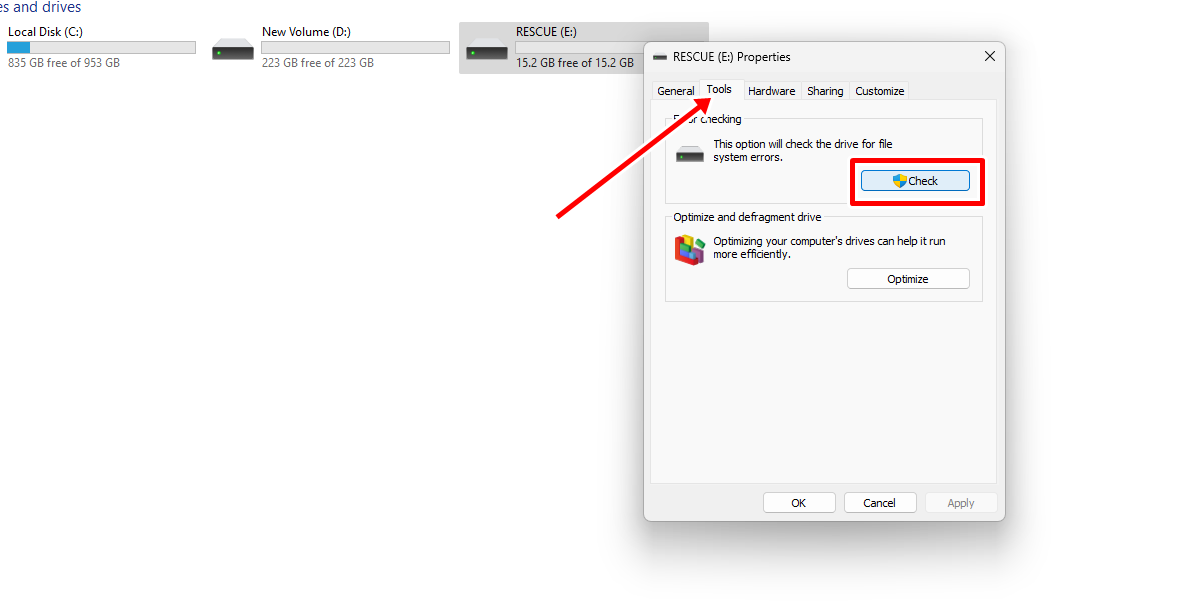
- Proceed for error checking.
Once the scan and repair are done, you can check the result and try to see if the drive worked properly. If not, go to the next method.
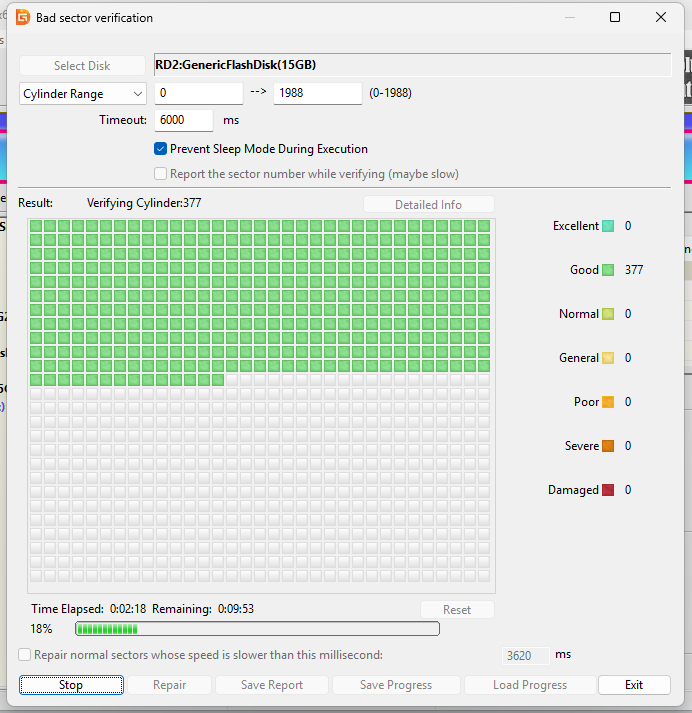
6: Check your drive’s health and Bad Blocks
In some cases, your drive would have surpassed its write limits, and this is why you can just read the data from it. In the case of SSDs, this can happen when the TBW is surpassed. To check your drive’s health and the level of back blocks, we can use a free tool called DiskGenius. Here is how to employ it to check for bad blocks.
- Open DiskGenius and locate your drive
- Right-click your drive and choose Verify or Repair bad sectors
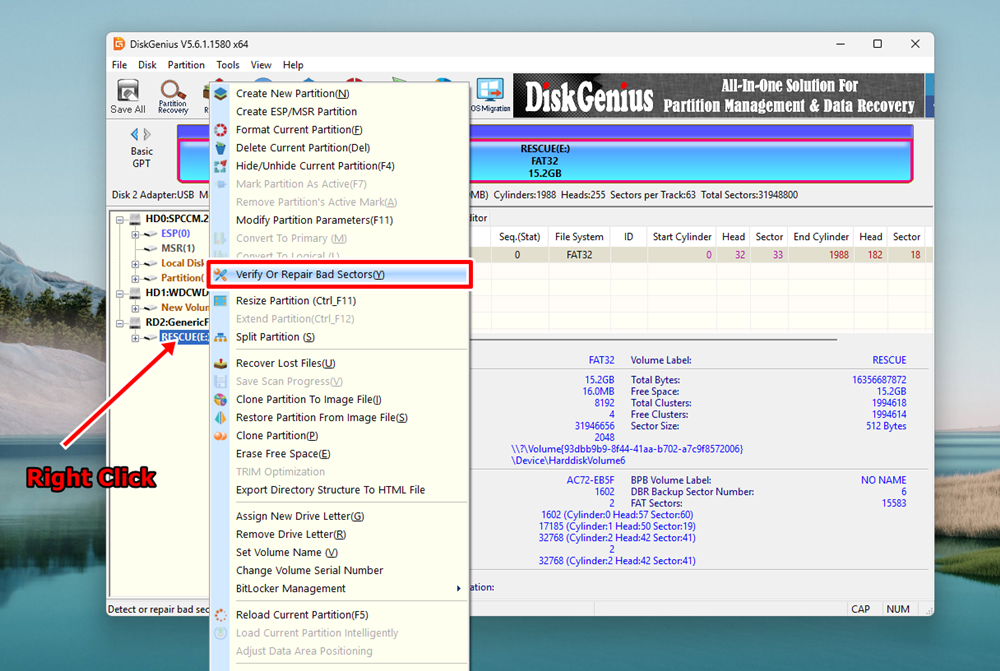
- Wait for the scan to complete, and then click Repair if the bad sectors are found. If nothing is found, proceed to the next step.
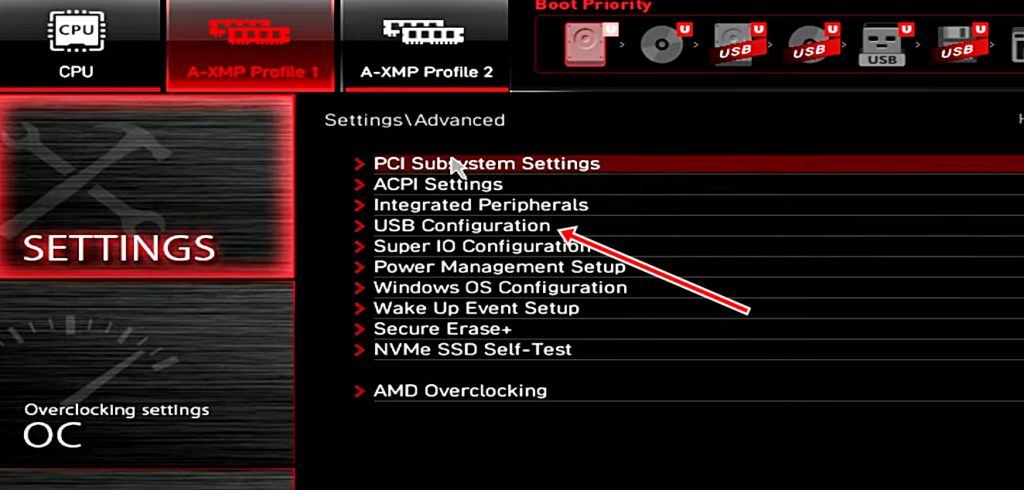
7. Check BIOS settings
Although the problem won’t be related to the BIOS most of the time but it is still worth giving this solution a try. Check all the USB settings in the BIOS, including the USB configuration menus and external peripheral settings. Now, different computers will have different BIOS settings the options will vary. However, there will be some settings that you can try checking out. If you find something related to accessing your drive, try enabling or disabling it.
8. Check for Firmware Issues
If your drive is from a popular brand like Sandisk, Crucial, HP, etc, you’ll probably have access to updating the firmware of your drive. This is most applicable when you face issues with the external HDDs or SSDs compared to the USB flash drives because very few of these software have features for the USB drives. However, sometimes this issue can be fixed by programs likes Sandisk’s PrivateAccess or Samsung’s Magician software. So, try installing and checking if these official software can help you in some way.
Manufacturer Firmware Tools (Official Links)
| Manufacturer | Official Firmware Tool | Supported Drives | Download Link |
|---|---|---|---|
| SanDisk | Sandisk Private Access | USB drives | Download |
| Samsung | Samsung Magician | Samsung SSDs & USB drives | Download |
| Kingston | Kingston SSD Manager | Kingston SSDs & USB drives | Download |
| WD (Western Digital) | WD SSD Dashboard | WD & SanDisk SSDs | Download |
| Crucial | Crucial Storage Executive | Crucial SSDs | Download |
| Seagate | SeaTools | Seagate HDDs/SSDs | Download |
| Toshiba | SSD Utility | Toshiba SSDs | Download |
| HP | HP USB Format Tool | HP USB drives | Download |
9. Update or Reinstall USB Drivers
I have given a detailed guide on updating USB drives using both automatic and manual methods in this article. So, check it out to see if this solves the problem.
10. Low-Level Format (Last Resort)
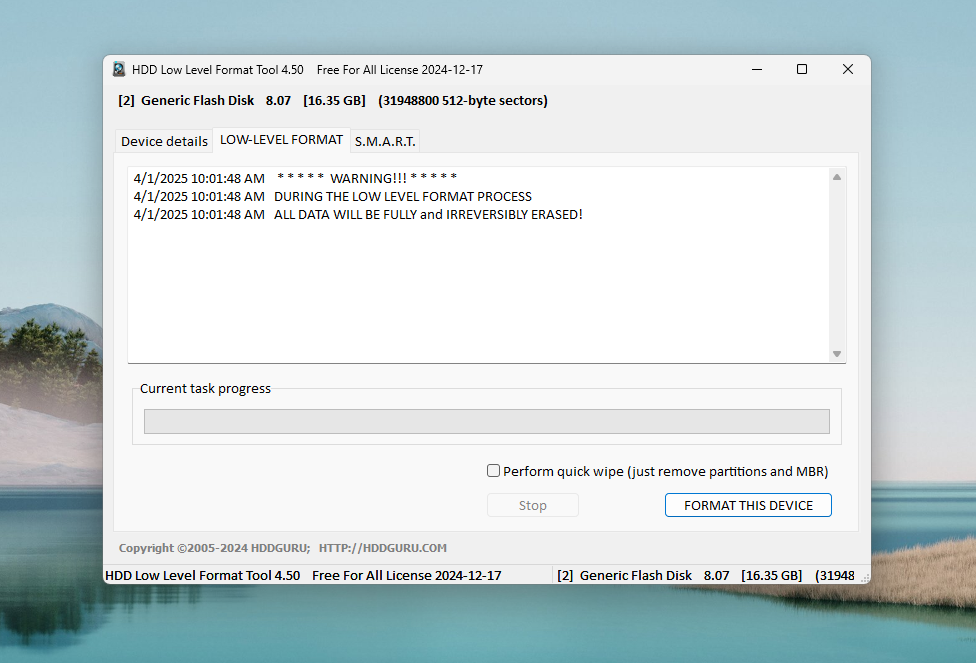
A low-level format is a sector-by-sector erasure of your storage drive. It is generally utilized when securely erasing a drive. It basically reset the drive to a factory-like condition. It will overwrite any conditions, hidden sectors, partitions, etc. So, if this write-protection error was showing because of some internal errors in the drive, this could help you.
It is good to use manufacturer-specific tools if they are available, as we discussed above.
However, there is a third-party, low-level format tool called HDD Guru that you can download from here. Install this software and run it on your computer. It should detect all the connected drives, including the internal and external ones.
- Click the drive with the write-protection issue and click Continue
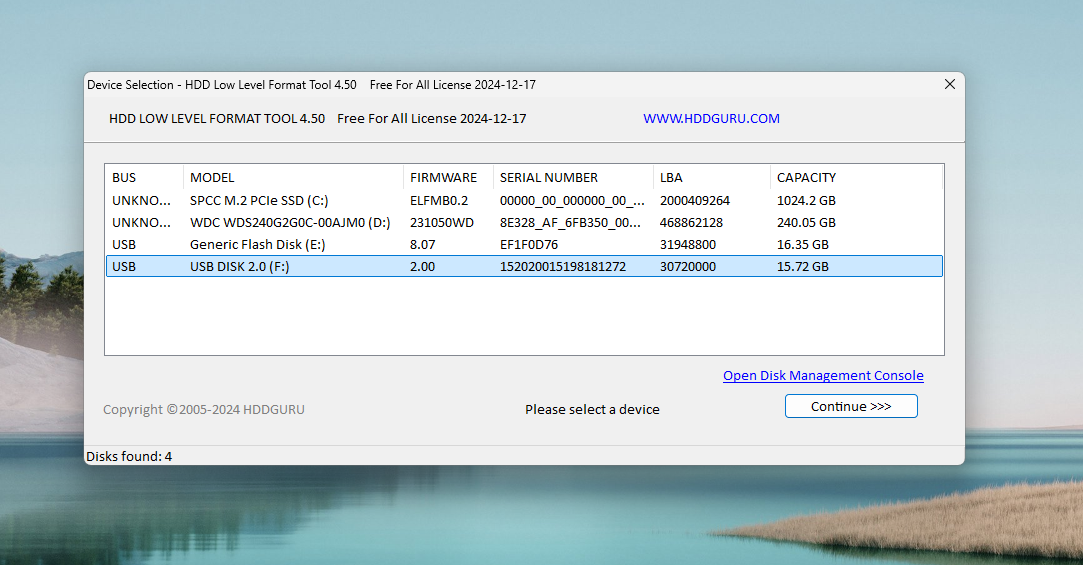
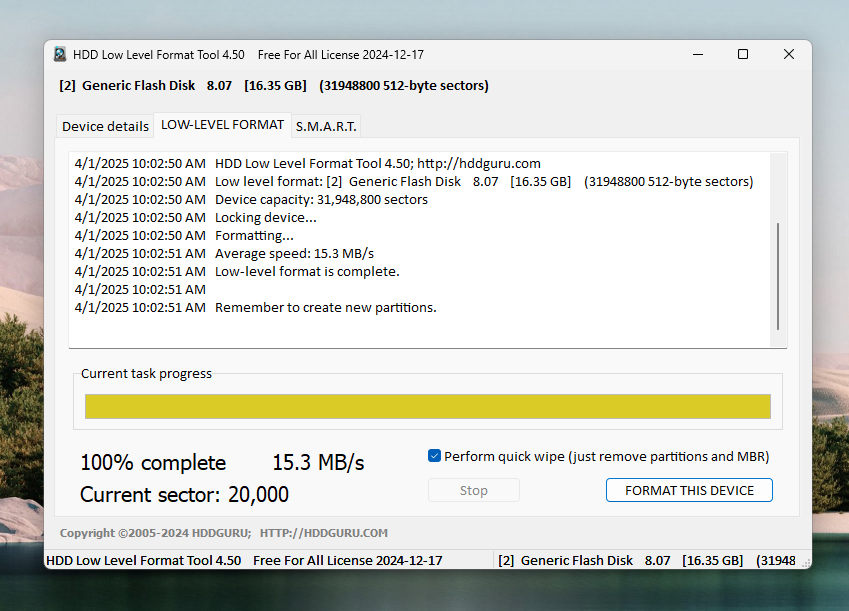
- Click Format this Device to proceed with the low-level format. Do not select the quick wipe method. Just do a full low-level format.
- Wait for the format to complete.
Conclusion
One of these 10 methods should fix your drive, and you’ll be able to write the data on it. But, as we discussed earlier, if your drive is old and has spent its total TBW or the endurance rating, you may not be able to write data to it anymore. However, if it’s a new drive, there is some serious issue with it. If that is the case, you should get in touch with the professional support of your brand. If the drive is under warranty, it is best to get it replaced by the company.
I hope this helps!