Affiliate Disclosure: This post may include affiliate links. If you click and make a purchase, I may earn a small commission at no extra cost to you.
Windows 10 and 11 come with OneDrive backup, providing a free 5GB backup plan to its users. With the Microsoft 365 subscription, you get 1TB of free cloud storage. You can also set up additional backups, such as Google Drive or Dropbox. However, for most people, this cloud storage is either insufficient or too expensive to upgrade.
So today, we are going to set up an external backup using either an external HDD or SSD. You can use almost any external and even internal drive for this, including flash drives. However, I will show you the method using an external Hard Drive.
For this, you need a working external drive and its connecting cable. You can even use an SSD or Hard Drive enclosure if you don’t have an external drive. So, without any delays, let’s get started.

Why should you have an offline/external backup of your computer?
Keeping your data in a single drive is always risky. It is good to have at least one backup of your important data. A 3-2-1 Backup is advised for critical data. It makes things safer for you in case of any mishap to your drive; you can easily restore everything from the point at which the backup was created. Now, with Windows 10 and 11, you get 5GB of OneDrive cloud backup, but for most users, this space isn’t enough. They can surely save and sync their essential folders, but they can’t store a system image on the OneDrive backup. The Microsoft 365 Basic plan starts at 1.99$ per month, where you get 100GB of cloud storage for one person with 50GB of mailbox storage.
Most people either use this 5GB space to store their most important files on OneDrive or opt for other platforms like Google Drive. However, the offline method is still the best because you always have the freedom to back up almost all your computers at minimal prices. Additionally, external drives are one-time investments that can be utilized for other tasks in the future.
I personally keep my system backed up on an external hard drive enclosure with 1TB of storage capacity. My backup is hardly 100GB, and I sync everything about once a month. We can also perform network backups using the NAS at home or in the office, a topic that warrants another article. But, for today, let’s see how you can do it on a hard drive in Windows 10/11.
How does the Windows External Backup and Restore work?
The backup file that we created on our external drive is an image file with a similar size to the data being backed up. Now, in Windows, you have two built-in backup features: System Image Backup and File History. File History is easy to use and is a simple way to back up personal files, such as documents and pictures. No compression is applied in the File History method, and the files are stored in their original format. However, you can’t use File History to back up the OS.
OS can be backed up using the Windows backup feature. In the backup, a system snapshot is created for the entire system, including the operating system. All user data, files, and software are backed up, although you have the option to select what you want to back up. All in all, this is the method you should choose to ensure complete system security.
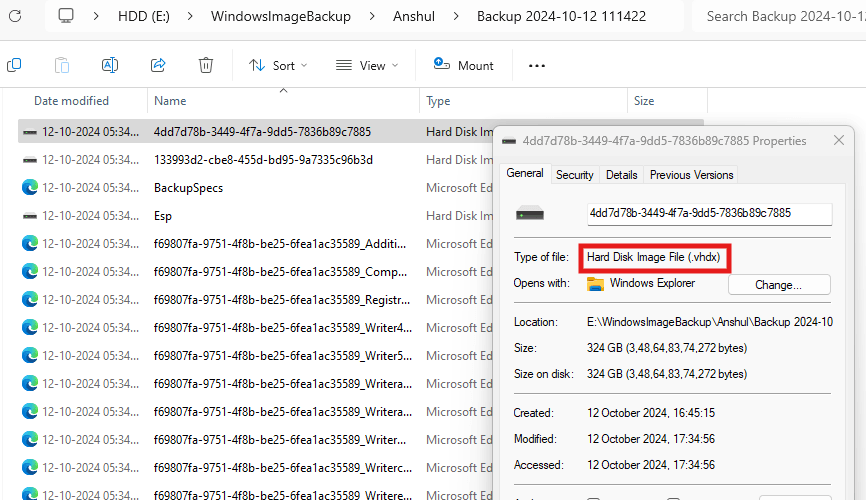
With the Windows backup, an image file (.vhdx) is created, which works as a copy of the primary hard drive or the SSD in your computer. Again, the backup size is almost the same as the total file size. When you need to restore the system, you can use this image file to return your system to its original state, as it was when it was backed up.
We can also create a system clone using third-party software, where we create an exact replica of the file instead of creating a compressed image. But, Windows allows us to create this image file and recover it later, saving some space with compression.
The Drawbacks of this legacy image backup
First of all, Microsoft has abandoned this feature. It’s literally marked “deprecated” in Windows 10+ docs. However, it still works if we want to use it. You receive no incremental or Differential Backups, so every backup is a full image. The .vhdx The image is an all-or-nothing block-level image, and you can’t mount it manually to extract files.
Steps to Create an External Backup on a Hard Drive
Please follow these steps carefully. These screenshots are from Windows 11. But, don’t worry, Windows 10 has almost the same things except for the different UI. You can easily follow this tutorial on both types of operating systems.
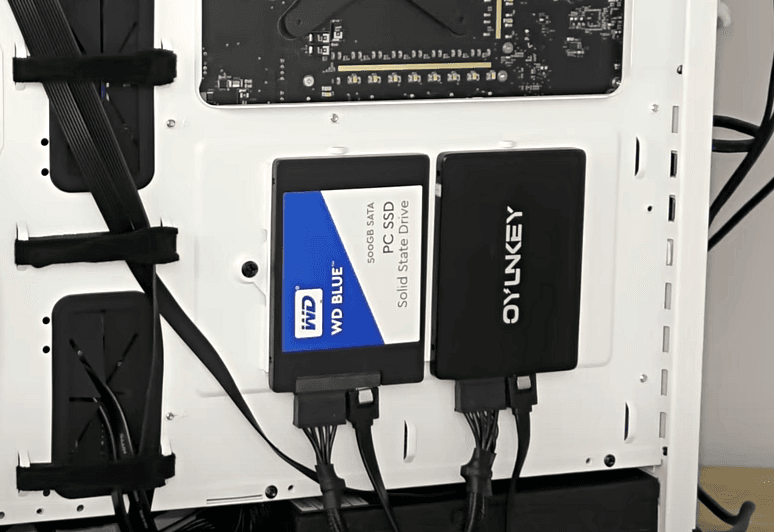
1. Grab yourself an external Hard Drive or SSD
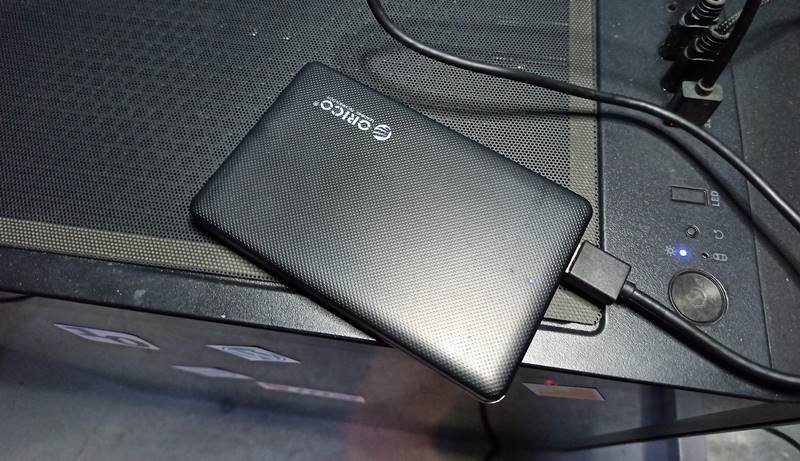
Any drive that connects to the USB or Thunderbolt port on your computer would work. In my case, I am using an external HDD enclosure with a 1TB 5200RPM hard drive. I have connected it to a USB 3.0 port on the desktop.
If you want to sync the backups more frequently and don’t want the hassle of USB connections, you can connect your hard drive internally to the motherboard. I have configured a backup on another computer in that way as well. I have set the backup synchronization frequency to daily.
Windows backup can also be used on flash drives, but it cannot back up the operating system there. Additionally, scheduled backups cannot be set up on a flash drive. It is always recommended to use an external hard drive or SSD.
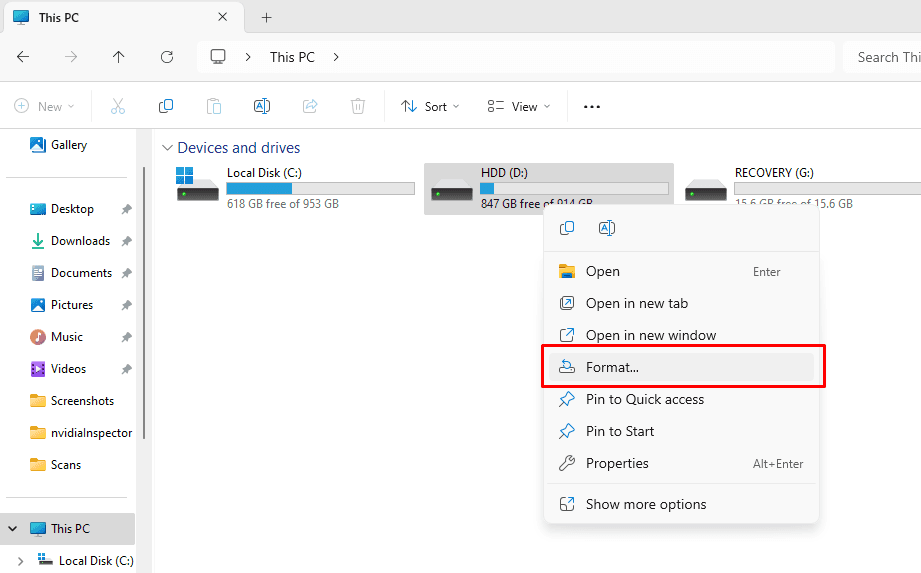
2. Format the hard drive
Once your hard drive is recognized by the computer, head to the File Explorer and locate your drive. Right-click it and click Format. Simply select the quick format option and proceed with the formatting. This will delete everything from your drive and prepare it for backup. Additionally, if partitions are present, you can remove them by accessing the Disk Management menu. You should use this drive only for backup purposes.
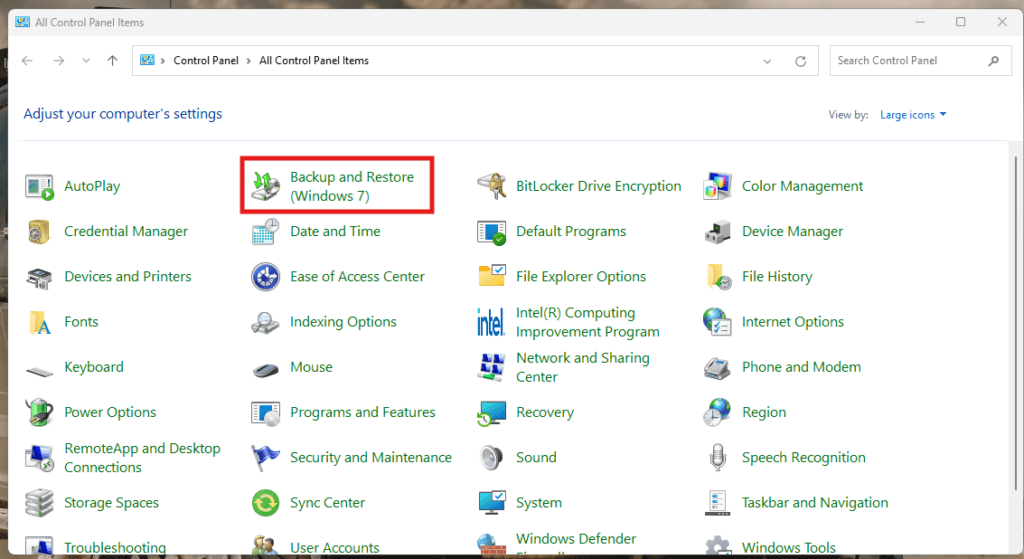
3. Go to the Backup and Restore (Windows 7) Menu
Yes, we will use the legacy backup tool that was used in older versions of Windows. Windows 10 and 11 have an advanced backup menu, but it is only available for online backups. For the offline method, open the Control Panel first. In the Control Panel, click Backup and Restore (Windows 7).
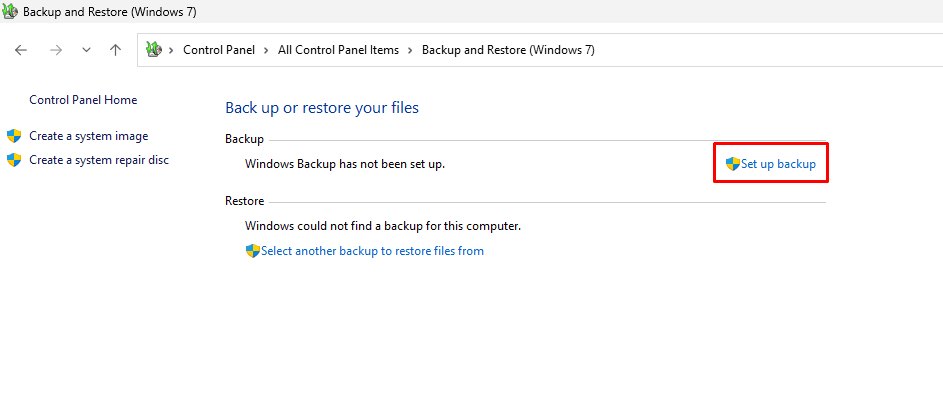
4. Open the Backup Menu
Inside the Backup and Restore menu, click the “Set up Backup” option.
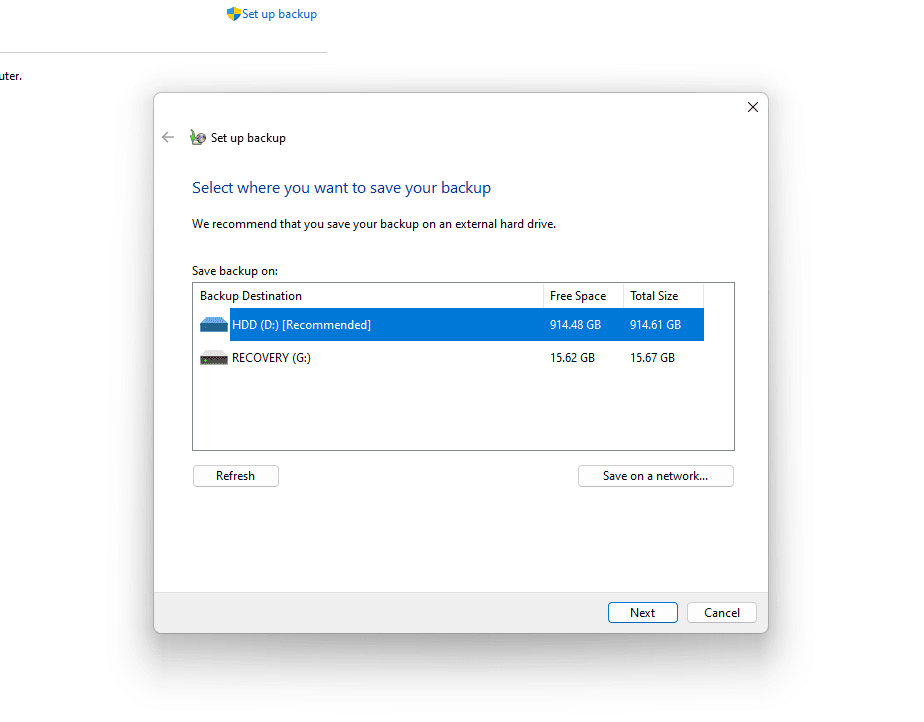
5. Choose your drive for the backup
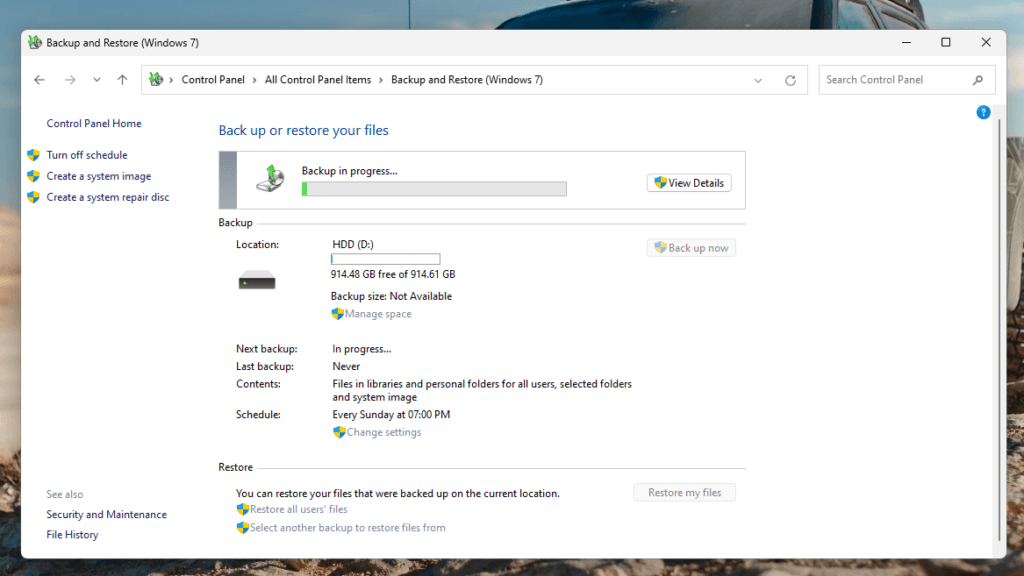
A new pop-up will open, displaying all the drives connected to your system. Here, we will choose our external driv,e which we are going to use for the backup. In my case, I would select the drive named HDD.
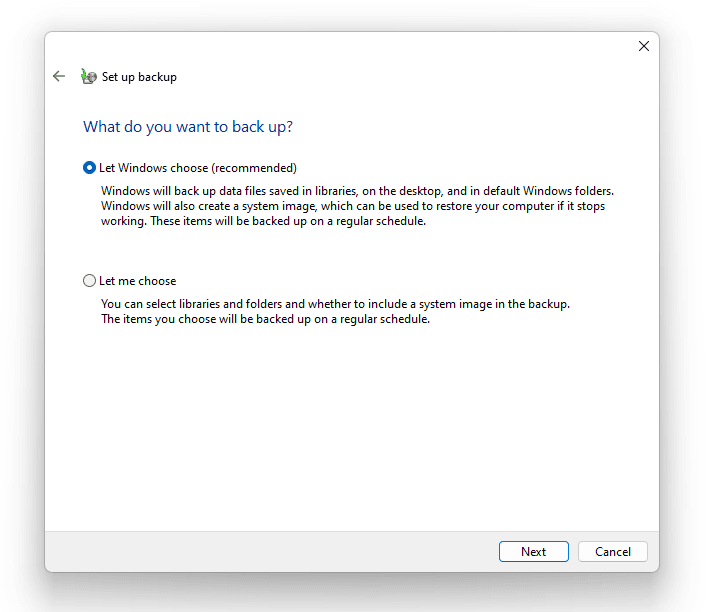
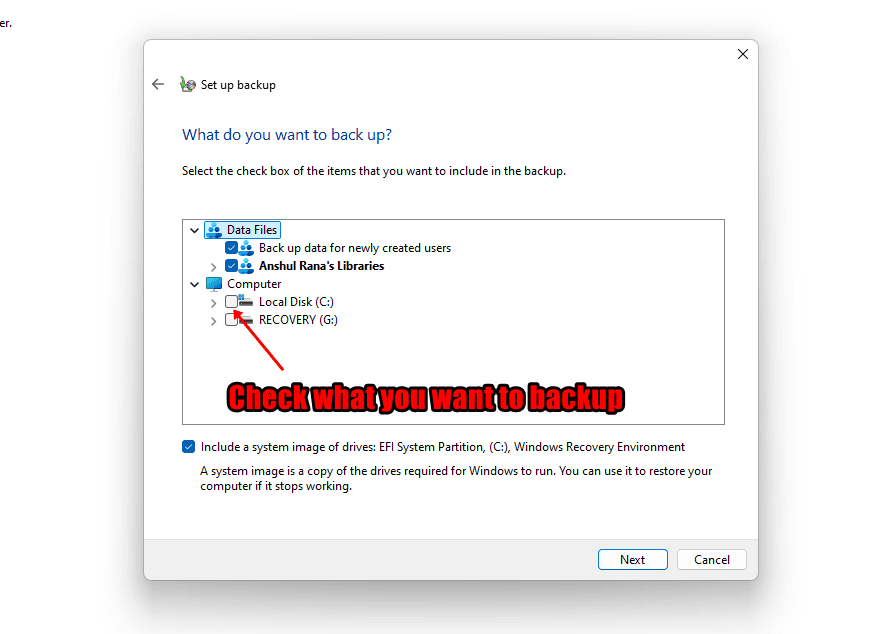
6. Choose what you want to back up
The next step is to choose what you want to back up in the drive. You see two options here, i.e., Let Windows Choose (recommended) and Let Me Choose. The first option saves everything on your computer, including the system image. However, I would go to Let me choose the option to ensure I have checked everything I want to back up.
7. Change the backup schedule
Once you click next after checking your desired backup items, you get to the next page to review and confirm the backup settings.
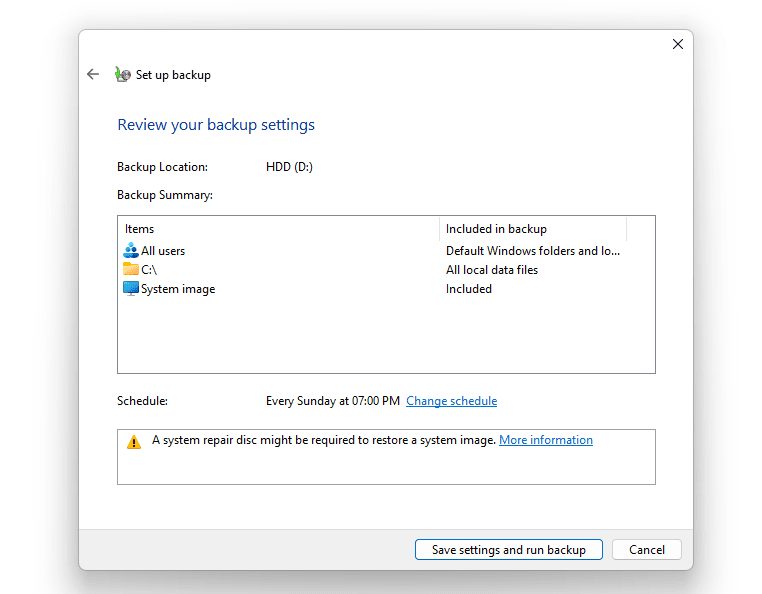
To change the backup schedule, click the Change Schedule link. In the next pop-up window, you can set your desired schedule. Depending on the daily, weekly, or monthly backup schedule, you get the option to select the desired day and time for the backup.
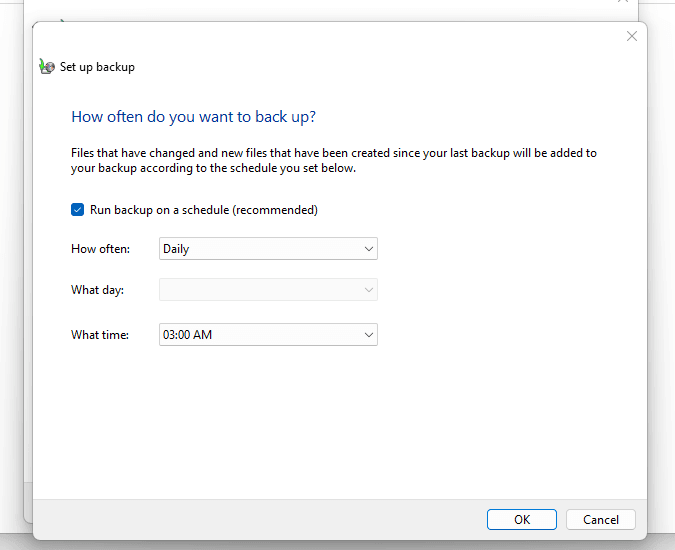
Once everything is done, click Save Settings and run a backup.
Note: If your drive isn’t connected to the computer at the scheduled time, the system will ignore that backup. You would need to manually re-initiate the backup to ensure everything is backed up. However, if you keep the drive connected for the next scheduled time, the backup will run automatically.
8. Wait for the Backup process to complete
Depending on the size of the files on your computer and the speed of your external drive, the backup can take a considerable amount of time. However, you can keep using your system during the backup. An SSD will generally complete this backup faster than a hard drive. In my case, it took around an hour.
This was all about the process of manual backup in Windows 10 and 11. Now, let’s see how you can restore the backup whenever required.
Recover the external backup (When the System is working)
You can recover this backup in two ways, i.e., from the Backup menu or the File History menu. We will use the same backup menu that we created to create the backup. Let’s see how to do it.
1. Open Advanced Recovery Options
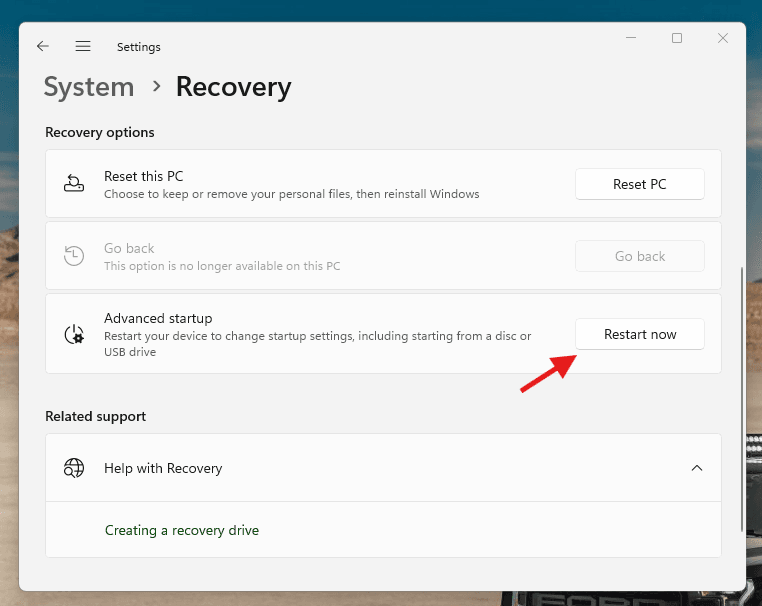
Go to Settings > System > Recovery. In the Advanced Startup section, click Restart Now. To access the Windows recovery environment, you can also hold the Shift key and click Restart in the Start menu.
2. Go to the System Recovery Menu through the Windows Recovery Environment
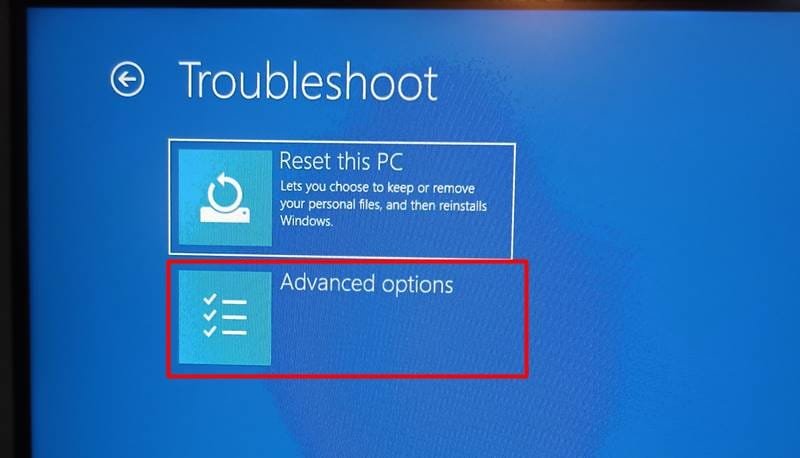
Inside the Blue Screen Recovery Environment, go to Troubleshoot and then click Advanced Options, and then System Recovery.
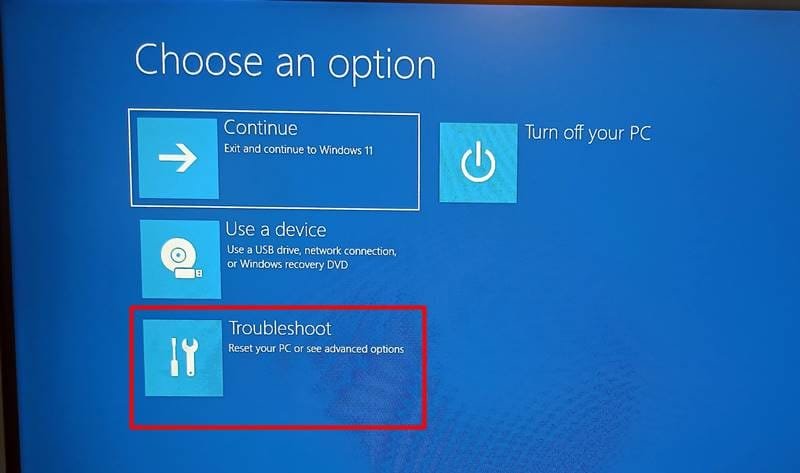
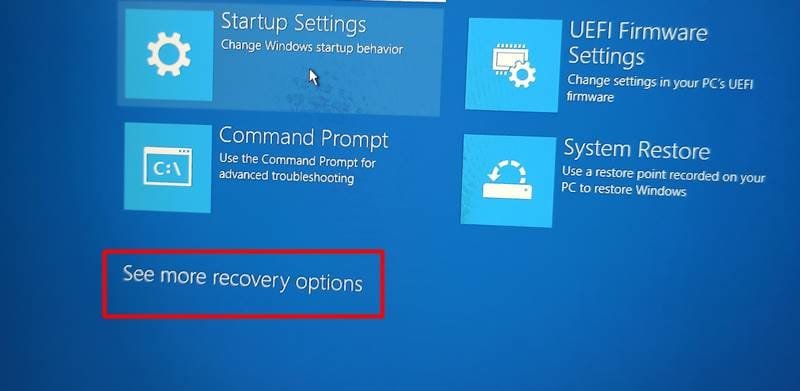
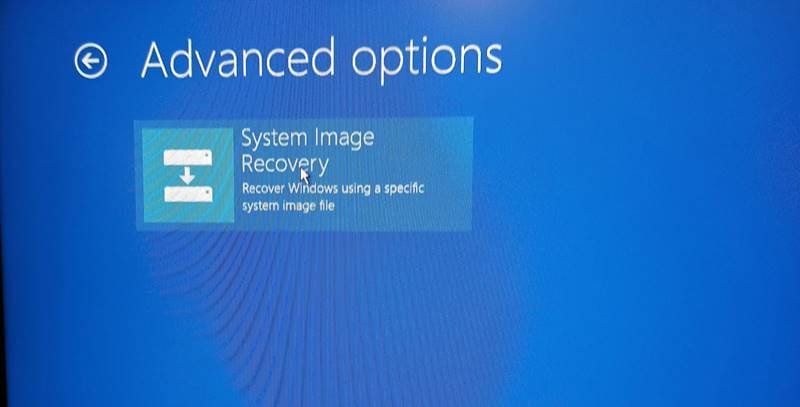
You can also see a separate See more recover options link. Click on that link and then click System Image Recovery.
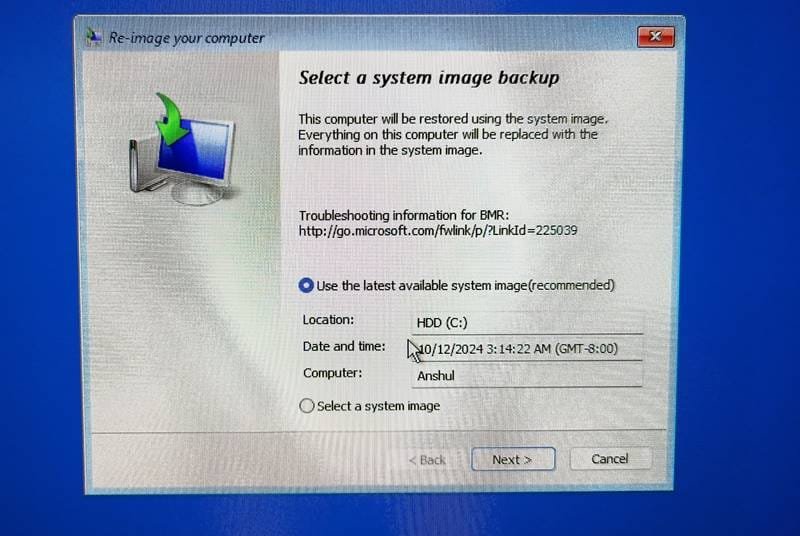
3. Select your System image or backup drive/location
Make sure your backup drive is connected to your system. Windows will automatically find any recovery drive connected to it. In the following menu, you get the option to choose your desired image backup.
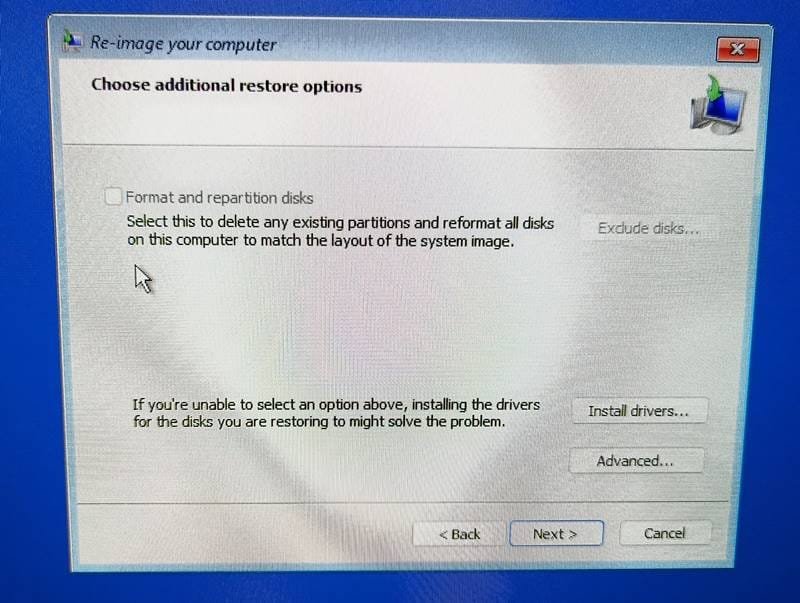
4. Choose other options (if required)
Through the additional settings, you get the option to format the target disk or do its repartitioning, which will erase all the data on that drive. If you just want to restore, click Next.
The restoration will take some time, again depending on the size of the backup. So, wait for that. The system will automatically reboot once the repair is done.
Recovering from external backup (When the System is not working)
If you can’t access the Windows Recovery Environment or your system won’t boot into the recovery environment, you’ll need to use bootable installation media (USB or DVD) to restore the system image. You can use this method if everything from your drive has been wiped out for any reason. Let’s see how you can do it.
1. Create a bootable USB Media
Download the Windows 11 or Windows 10 Installation media, depending on your backed-up operating system.

Grab yourself a flash drive of at least 8GB and insert it into your computer. Make sure the system detects it and formats it before anything else.
Install the downloaded Windows Media Creation Tool and choose your flash drive when asked for the installation drive.
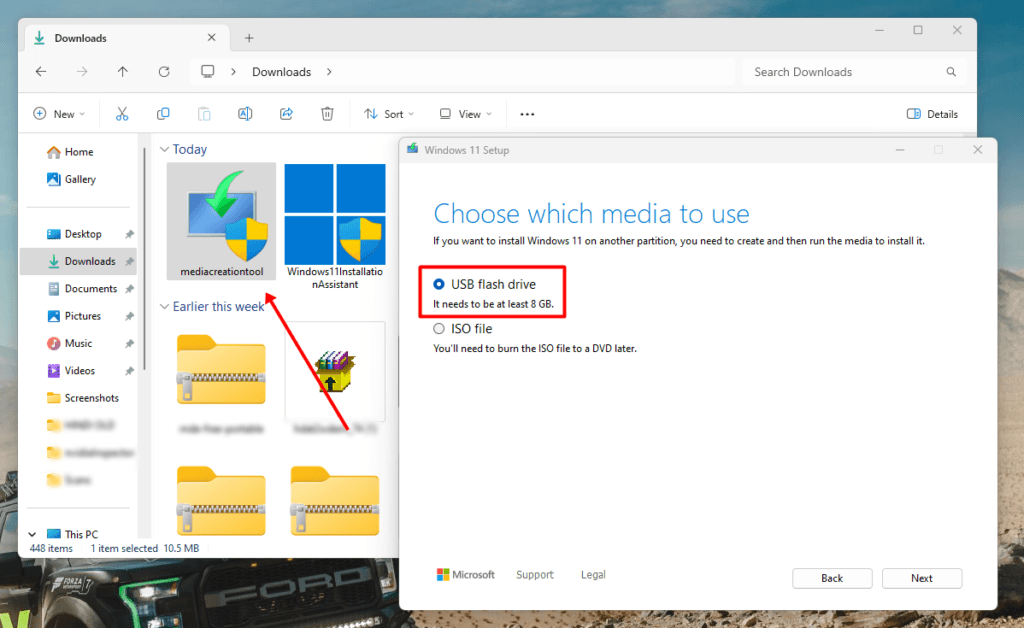
It will take some time, so wait for it. Once the bootable installation media is created, the system will tell you about that.
2. Boot from the Installation Media
Keep your bootable USB drive inserted in the system and give it a Restart. You can also turn it off and then turn it back on. When it is turning on, immediately press the BIOS/UEFI key to enter the boot menu or the BIOS. For most systems, this key is F2, F12, Del, or Esc. However, it may vary, and you can check it online. If you do everything as told, you should enter this menu.
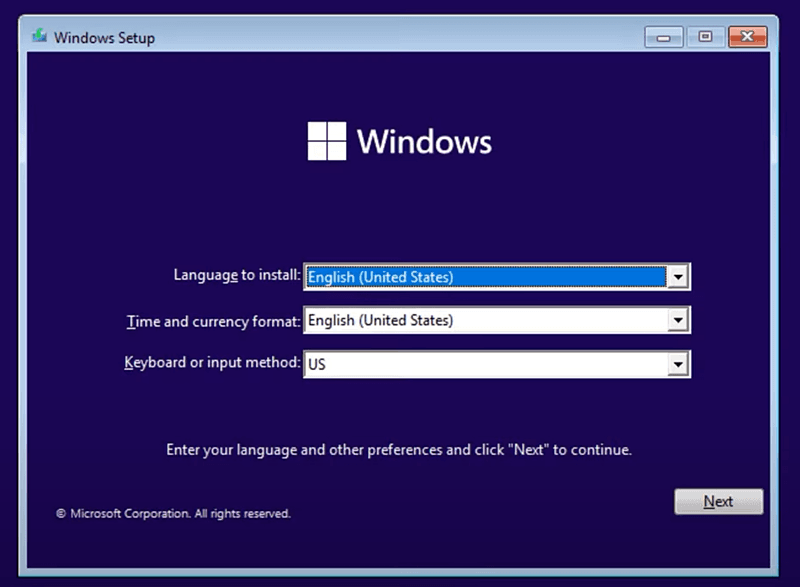
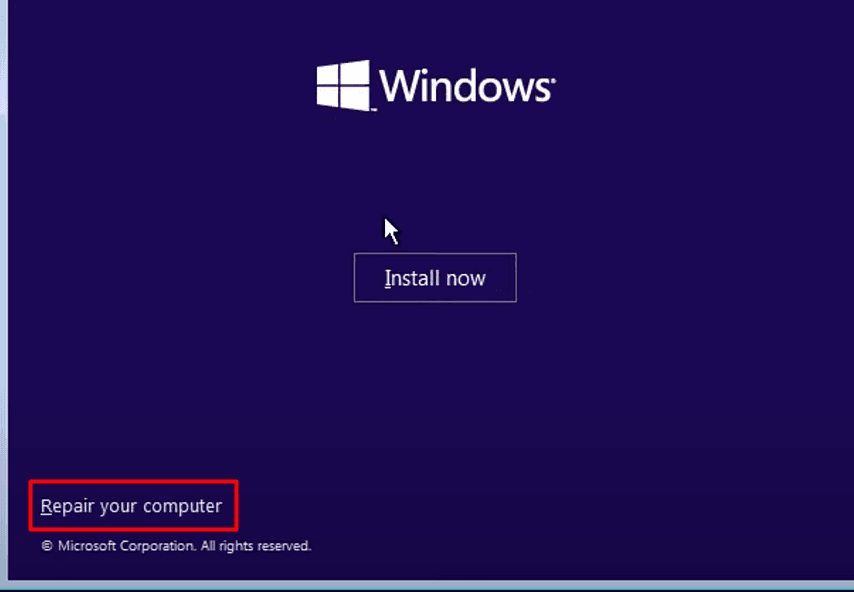
3. Click Repair your computer (Don’t click Install)
When you click Next on the first page, you get the option to install Windows. You don’t have to do that because we have to restore the system, not install a new one. So, click the option Repair your Computer.
4. Perform the same steps as done in the above method
Once you click Repair your computer, you will enter the Windows Recovery Environment. So, you can just use the same settings that we used above to restore the backup. You can use the system image from the backup drive and restore your system without any issues.
I hope this helps!