Affiliate Disclosure: This post may include affiliate links. If you click and make a purchase, I may earn a small commission at no extra cost to you.
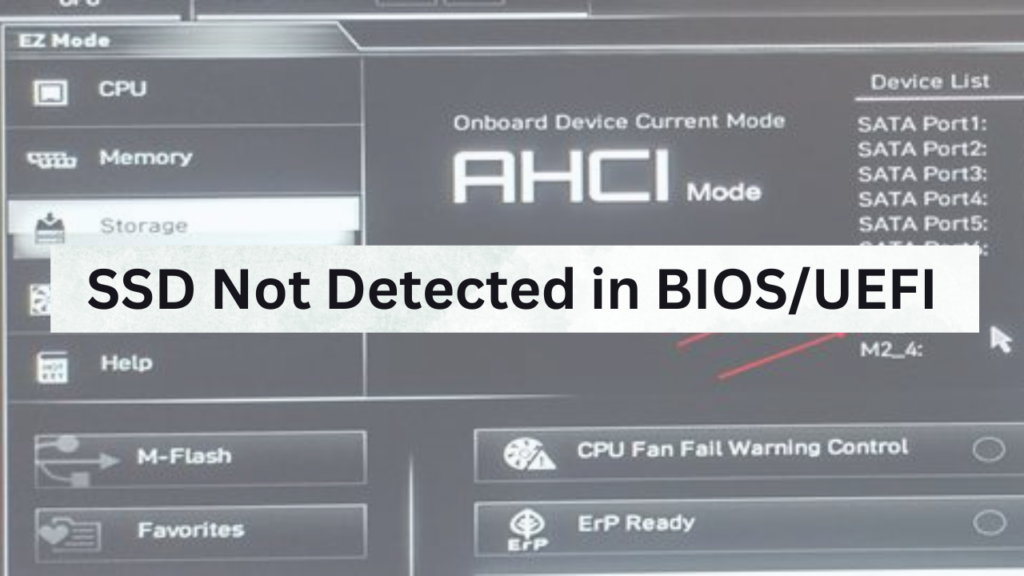
Working with the BIOS can be pretty complex for most people. Combine it with a hardware issue like “SSD not detected in BIOS/UEFI“, and you get a real mess in front of you. However, there are solutions to everything. For this particular problem, we are going to try all the possible solutions.
If your system has only one SSD, and it is not detected, your system will end up in the BIOS. It won’t boot because the OS files are not available. However, if a secondary drive is undetected, you will not see it in File Explorer. These are two different situations, and we are going to imagine your main drive with the operating system is not being detected. There could be another situation where you’ll see your drive in the BIOS but not in the File Explorer or Disk Manager. In this article, we are going to discuss only the solutions related to the BIOS/UEFI.
There can be many reasons why this might happen. It is possible that the SSD isn’t properly installed or is faulty. In this case, we might have to try it on other systems or use another drive on our computer. Other things could be related to the software. There are many other things, and we will talk about all of them with possible solutions. So, let’s get started.
1. Check Physical Connection
The first and most important thing is to make sure the SSD is properly installed on its port. Let’s see the specific steps you can take.
Ensure Proper Connection
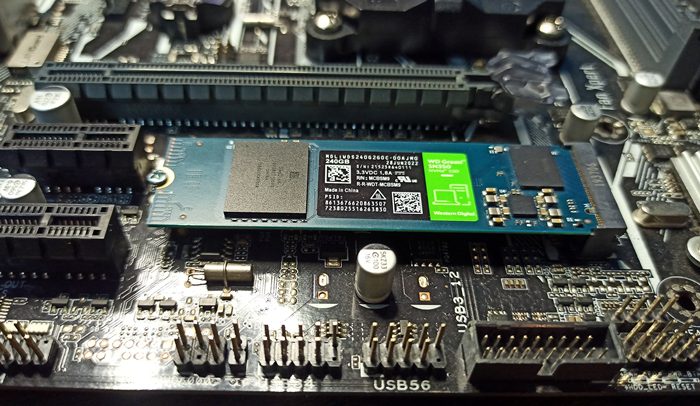
For an NVMe SSD, there is nothing much to double-check. Just make sure the screw is properly tightened and that the SSD is fully seated in the port.
For SATA SSDs, especially in desktops, it is important to check if the SATA and Power cables are properly fitted. If you find the connecting cable a little loose, make sure to properly insert them at place. You can also try using different SATA power cables and SATA connection cables.
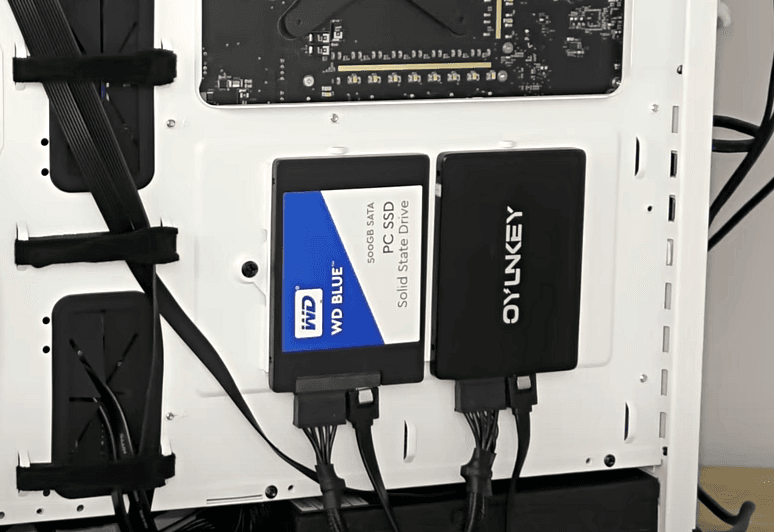
Also, check the cable connections on the motherboard and power supply.
2. Check BIOS/UEFI Settings
Modern motherboards have many settings, and turning some features on or off can prevent the system from detecting your SSD. Let’s see what you can do.
I am assuming you are being taken to the BIOS automatically. If not, you’ll have to press the BIOS key during system boot. Normally, the special keys are Del, Esc, F11, F12, etc. You can search the internet to find your motherboard’s key. Once you are in the BIOS or UEFI, the settings you must check are below.
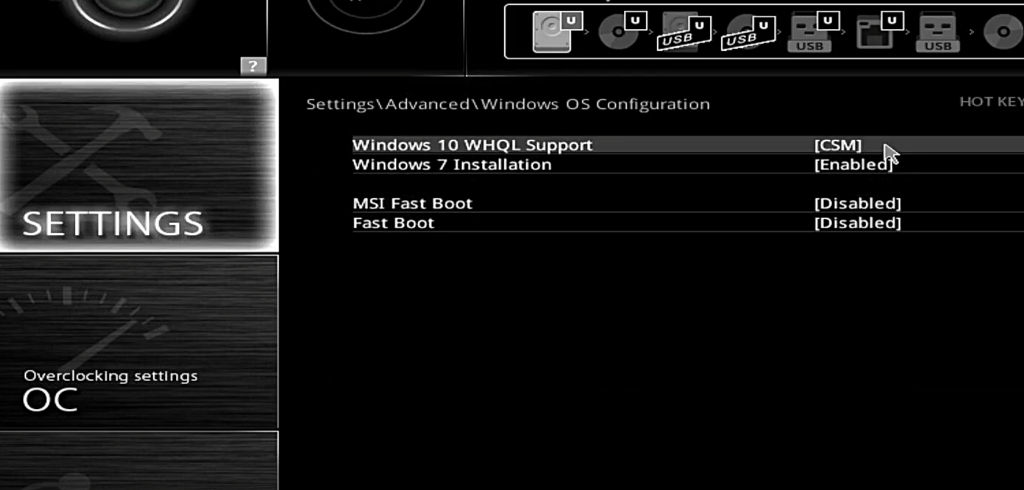
2.1 Enable/Disable CSM (Compatibility Support Module)
CSM is a feature available in most modern motherboards. CMR allows the drives formatted by MBR to be detected by the BIOS. Now, CSM, when disabled, can cause issues when you try to use some SATA SSDs. This mainly happens in the older drives only. Don’t get confused here. Just enable or Disable CSM based on your SSD type:
- For Older SATA SSDs → Enable CSM.
- For NVMe SSDs → Disable CSM.
- Click the Settings option in BIOS and go to Advanced Settings.

2. Click the Windows OS configuration option in the advanced settings menu.
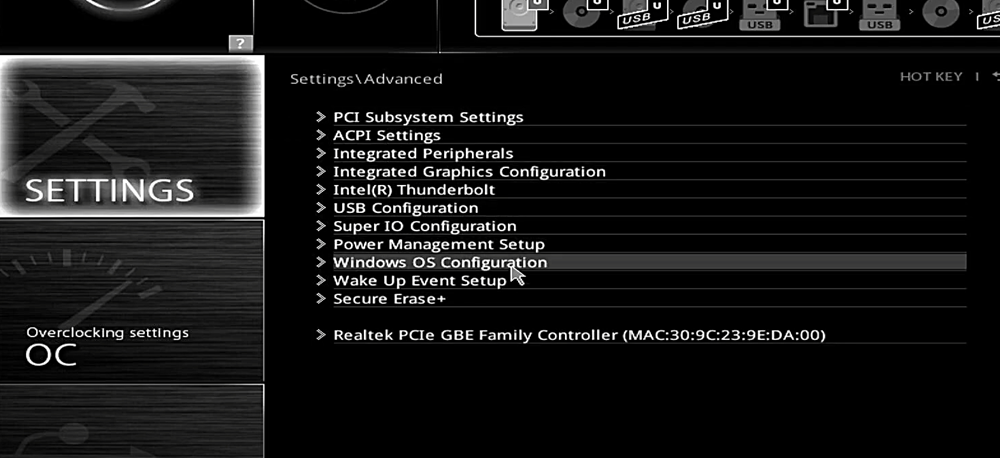
3. Enable or Disable CSM as we discussed above.
In some motherboards, the CSM option can be harder to find compared to the others. However, it is an important thing you should try to check if it helps the SSD detect.
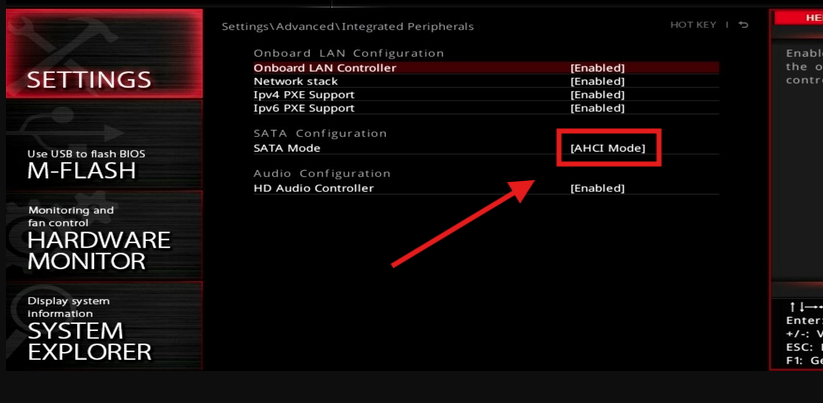
2.2 Set the SATA mode to AHCI
Unless you are using RAID, set the SATA mode to AHCI instead of IDE or RAID. The AHCI mode allows for hot swapping, Native command queuing, and faster performance. Generally, it does have anything to do with the compatibility but it is good to turn it on before we proceed.
2.3 Enable the M.2 Slot (if applicable)
In different motherboards, these settings can be found in different places. Also, some motherboards may not have this thing at all. So, the first step is to set the M.2 configuration or mode to Auto.
In some motherboards, like the MSI and Asus, you get the option to change the PCIe bandwidth of M.2 slots from half to full. Make sure you set it to X4 instead of X2.
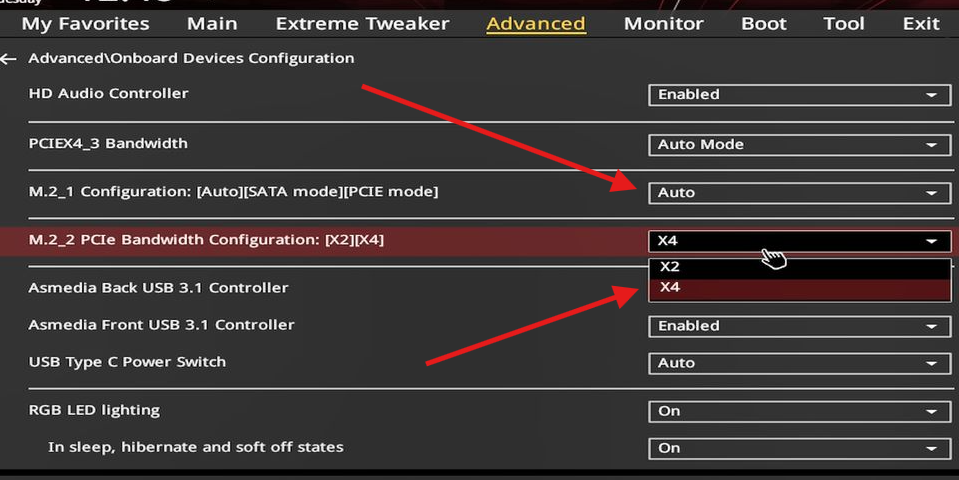
Now, if there are multiple M.2 slots, you can either change the settings for all the slots or properly identify where you have installed your SSD.
3. Check in other Computer/Motherboard Port
If you have another computer to check, you can install it there and see if it is getting detected and working. If it is working there, it means there is an issue with your computer. Most probably, it will be in the BIOS settings, which we are going to discuss in the next section. However, it could be a hardware issue in the port of the motherboard. In that case, you may have to get the motherboard checked by a professional. If it is under warranty, you can submit a replacement request.

Alternatively, you try installing another SSD (if you have one) in the same slot to check if the slot is Ok. Most motherboards will have multiple M.2 slots as well as connectors for SATA SSDs. So, it is worth testing your SSD in another slot.
4. Update BIOS
Updating BIOS will vary depending on the motherboard’s brand. Now, if your primary SSD is not being detected, you may not be able to start your computer, and that makes the BIOS update much harder for you. However, I have found the official BIOS update guides of all the popular motherboard brands listed below in the table.
If your motherboard brand isn’t listed above, you can easily find the BIOS update guide by doing a simple search on Google or YouTube.
After updating the BIOS, check if the SSD is being detected or not. If not, you can proceed to the next step.
5. Reset CMOS/BIOS Settings
If you think you have done something wrong in the BIOS and don’t remember it, you can simply reset the BIOS settings to the factory settings. There are two main methods to do so. The first one is through the BIOS/UEFI menu itself. Below are the steps.
Method 1: Through the BIOS menu
- Restart your PC and press the BIOS key (usually Del, F2, F10, or F12) during boot.
- Look for “Load Optimized Defaults” or “Reset to Default” under Exit or Advanced Settings.
- Select it, confirm, and save & exit (usually F10).
Method 2: Using the motherboard jumper
This jumper may not be available in your motherboard because it is a specific feature offered by some brands. If you want to know, you can just check your motherboard’s BIOS for availability.
- Turn Off Your PC & Unplug It.
- Locate the CMOS Jumper
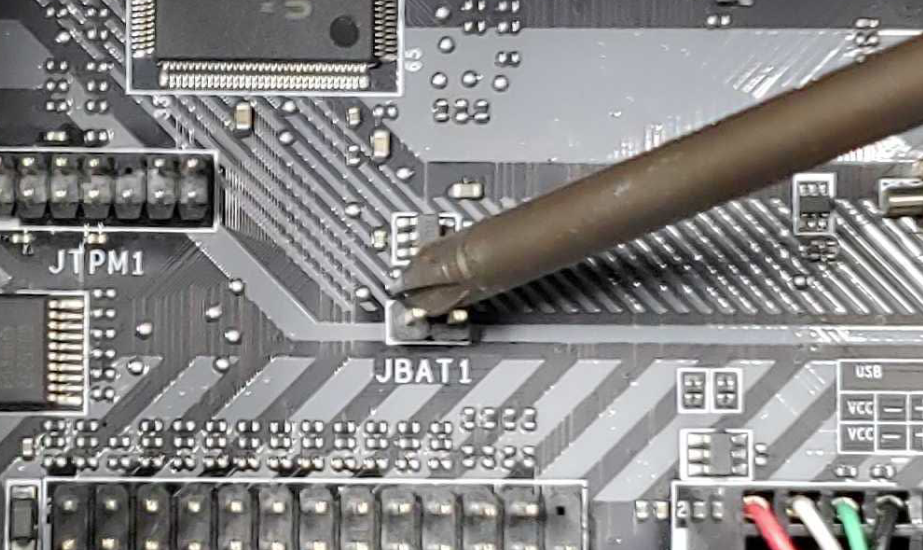
- Find a 3-pin/2-pin jumper labeled “CLR_CMOS” or “JBAT1” on the motherboard.
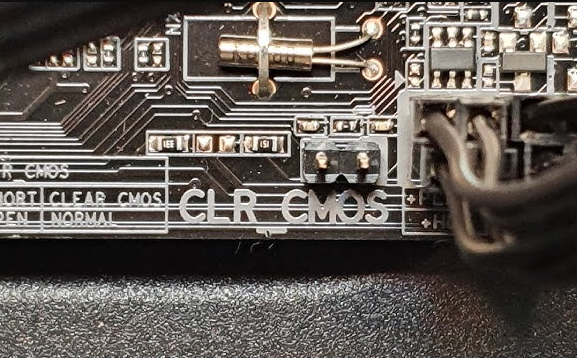
- Move it from the default 1-2 position to 2-3 position for about 10 seconds, then move it back.
- In the case of the two pins, as we can see in the image above, you just join and interconnect them with a screwdriver.
- Turn On Your PC
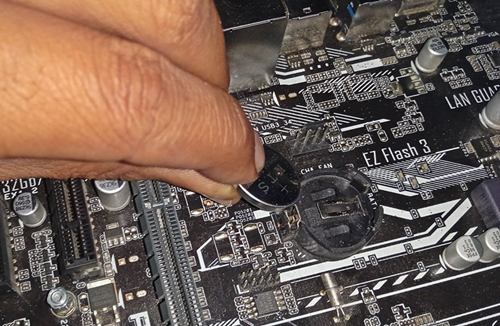
Method 3: Remove the CMOS battery (Full Reset)
A CMOS battery is used to power the CMOS chip, which stores some important information like the system boot order, time, data, and hardware configurations. When you remove the CMOS battery, it cuts power to the CMOS chip, which causes it to reset to factory default settings without any additional effort. Below is how you can do it.
- Turn Off & Unplug Your PC
- Find the CMOS Battery
- It’s a small round silver battery (CR2032) on the motherboard.
- Remove the Battery
- Take it out and wait for 5-10 minutes.
- Reinsert the Battery & Power On
Conclusion
I hope, with the steps we followed above, that your system’s BIOS/UEFI will be able to detect the SSD. However, if you have confirmed that your SSD is fine but your system is the only place where it doesn’t work, it’s time to get your motherboard replaced (if under warranty). You can try repairing it. Otherwise, it may be time to buy a new one.


![How to Set up External Backup in Windows? [Complete Guide]](https://storedbits.com/wp-content/uploads/2024/10/setup-external-backup-in-windows-768x433.png)