Affiliate Disclosure: This post may include affiliate links. If you click and make a purchase, I may earn a small commission at no extra cost to you.
When your boot SSD is nearly full, performance may drop, but Windows remains usable. At this time, upgrading your storage could be an option. Upgrading to a larger or faster SSD by cloning the SSD doesn’t require reinstalling everything from scratch.
Cloning an SSD creates a complete, bootable copy of your current system drive on a new SSD, including Windows, drivers, apps, games, settings, and hidden boot partitions. This allows the new drive to directly replace the old one. Cloning differs from copying files via File Explorer (data only) or creating a disk image (a backup that needs restoring).
Cloning is ideal if:
- You’re upgrading to a larger SSD
- You want to switch from SATA to faster NVMe
- Your current system is stable and working fine
- You want zero downtime and no reinstall
Avoid cloning if:
- Your system has malware or frequent crashes
- The drive has serious errors
- You want a clean start
In this guide, you’ll learn exactly how to clone SSD to a new drive step by step and how to avoid common mistakes.

Before You Clone SSD to SSD (Checklist)
Skipping preparation is the #1 reason cloning fails. This short checklist keeps you from a failing SSD clone. Take a few minutes to check the following:
- Confirm New SSD Compatibility: Ensure the SSD form factor and interface (2.5″ SATA, M.2 SATA, or M.2 NVMe) are compatible with your PC or laptop
- Check New SSD Capacity: The new SSD must have at least as much usable space as the data currently on your old drive. Cloning to a smaller SSD is more complex.
- Check System Health: Make sure Windows is generally stable, and that quick disk checks reveal no major file system errors.
- Disable BitLocker: Encrypted drives can cause issues during cloning. To check: Go to Control Panel → BitLocker, and turn it off temporarily.
- Backup Important Data: Copy irreplaceable documents, photos, and work files to an external drive or cloud storage as an extra safety net.
- Connect New SSD: For desktops, confirm you have a free SATA port or M.2 slot. For laptops with only one slot, prepare an external disk enclosure or a USB-to-SATA adapter for the new SSD.
Choose Cloning Method and Tool to Clone SSD
There’s no single “best” SSD cloning tool that works for everyone. The right option depends on your hardware setup, your experience level, and whether you’re already using a specific SSD brand. Instead of chasing one “perfect” tool, it’s better to understand the 3 main types of cloning solutions-and when to use each.
Manufacturer Software
Many SSD manufacturers provide their own migration software designed specifically for their drives. These free disk-cloning tools are designed to help users move data from an existing disk to a new SSD of the same brand, such as Samsung Magician for Samsung SSDs and Acronis True Image for Crucial or WD SSDs.
They usually come with a clean, guided interface:
- Select your current drive (source)
- Select the new SSD (target)
- Start the cloning process
Why people choose them:
- Very easy to use (ideal for beginners)
- Optimized for the manufacturer’s SSDs
- Minimal configuration required
Limitations to keep in mind:
- Often only works if at least one drive matches the brand
- Fewer advanced features compared to third-party tools
- Limited flexibility for complex setups
If you’ve just bought a new SSD from a major brand, this is usually the fastest and safest place to start.
Third-Party Disk Cloning Software
Third-party disk cloning software is the most popular option because they support a wide range of hardware and offers much more flexibility.
Common capabilities include:
- Full disk cloning
- “Migrate OS to SSD” shortcuts
- Automatic partition resizing
- Support for different SSD brands and interfaces
Many tools offer free versions that are more than enough for a one-time migration.
Why this is the best choice for most users:
- Works across different brands (no restrictions)
- More control over partitions and disk layout
- Reliable for both simple and advanced scenarios
If you want a smooth, flexible experience-especially when upgrading to a larger or different type of SSD-this is usually your best option.
Bootable USB Cloning Tools
Some cloning tools run entirely from a bootable USB drive rather than within Windows. This works if your system has errors.
With this method:
- You connect both drives
- Boot your computer from the USB
- Perform cloning in an offline environment
Advantages:
- Avoids interference from running programs
- More stable for problematic or corrupted systems
- Useful when Windows won’t boot
Trade-offs:
- Interface can be more technical
- Requires extra setup (creating bootable media)
- Higher risk of selecting the wrong disk if you’re not careful
This method is best reserved for troubleshooting situations rather than everyday upgrades.
How to Choose the Right Tool
For most users upgrading a healthy system (especially Windows 10 or 11), the decision is straightforward:
- Want the easiest experience? → Use a brand migration tool
- Want flexibility and advanced cloning features? → Use third-party software
- System unstable or won’t boot? → Use a bootable USB tool
In general, a standard Windows-based cloning application strikes the best balance between ease of use and reliability.
How to Clone SSD to Another SSD (Step-by-Step)
Although the exact interface differs between cloning programs, the overall process is usually similar. Connect the new SSD, select the source and destination drives in the tool, review the partition layout, then start the cloning process.
Step 1. Connect the New SSD
For desktops:
- Install the SSD internally via SATA or M.2 slot
For laptops:
- Use a USB-to-SATA adapter or an external disk enclosure
Then:
- Open Disk Management to confirm your Windows PC recognizes it
- Initialize the disk (choose GPT for modern systems)
Step 2. Install and Launch Cloning Software
- Download your preferred disk cloning tool and open it.
- Look for options like: Clone Disk, Disk Clone, Disk Mode, Disk Copy, Migrate OS, etc.
Step 3. Select Source Disk and Target Disk
- Source Disk = your current SSD
- Target Disk = new SSD
Be extremely careful here-choosing the wrong disk can erase your data.
Step 4. Configure Cloning Settings
Depending on your situation:
If upgrading to a larger SSD:
- Enable or choose auto-resize partitions
- Expand the main partition to use the full space
If cloning to a smaller SSD:
- Make sure the used space fits
- Shrink partitions beforehand if needed
Step 5. Start Cloning Process
Click Start or Proceed to clone the SSD and wait for the cloning process to complete.
Time duration: depends on how much data is on your source drive.
- Small drives → ~20-30 minutes
- Large drives → 1-3 hours
During cloning:
- Avoid shutting down the PC
- Don’t run heavy programs
Step 6. Replace or Set Boot Drive
Once cloning finishes:
Option A (recommended):
- Shut down the PC
- Remove old SSD
- Install the new SSD
Option B:
- Enter BIOS/UEFI
- Set the new SSD as the primary boot device in BIOS/UEFI settings (the key is often F2, F10, F12, Esc, or Delete during startup)
Step 7. Verify the Cloned SSD
After booting, check:
- Windows loads correctly
- Files are intact
- Programs work normally
- Storage capacity is correct
What You Should Do After Cloning
1. Enable TRIM
TRIM improves performance and lifespan. Open Command Prompt as administrator and run:
fsutil behavior query DisableDeleteNotify
If result is DisableDeleteNotify = 0, TRIM support is enabled for SSDs.
2. Extend Partition
If your new SSD is larger but shows unused space:
Open Disk Management. Right-click it → Extend Volume
3. What to do with old SSD
After confirming everything works. You can cope with the old SSD with the following options:
- Keep it as a backup drive
- Use it as external storage
- Repurpose it for another system
- Securely wipe it before selling
Don’t erase it immediately. Keep it for a few days just in case.
Common SSD Cloning Problems (And Fixes)
Even though SSD cloning is usually straightforward, things don’t always go as planned. Below are the most common issues users run into, along with clear explanations and practical fixes.
Cloned SSD Won’t Boot
What happens:
After cloning, your computer either:
- Boots into the old drive
- Shows a “No boot device” error
- Gets stuck in a boot loop
Why does it happen?
- Boot order is incorrect
- Boot partition wasn’t cloned properly
- UEFI/Legacy mode mismatch
- Old drive is still interfering
How to fix it:
- Enter BIOS/UEFI (usually press F2, Del, or F12 at startup)
- Set the new SSD as the first boot device
- If possible, temporarily disconnect the old drive
- Make sure boot mode matches:
- GPT disk → UEFI
- MBR disk → Legacy/CSM
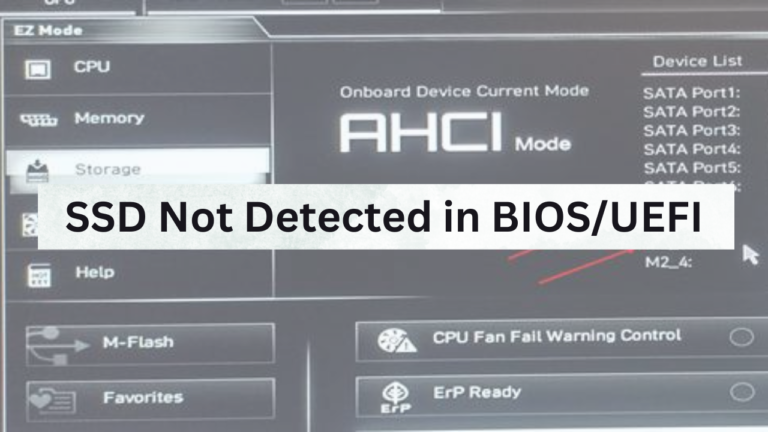
SSD Not Showing Up After Cloning
What happens:
The new SSD is not visible in:
- File Explorer
- Disk Management
- BIOS
Why does it happen?
- Drive not initialized
- Loose connection or faulty adapter
- Driver issue
- BIOS port disabled
How to fix it:
- Open Disk Management
- If the disk shows as “Unallocated,” → initialize it
- Reconnect cables or try another USB port
- Update storage drivers
- Check BIOS settings (enable SATA/NVMe port)
Target SSD Is Smaller Than Source
What happens:
Cloning fails or refuses to start.
How to fix it:
- Ensure the used space is smaller than the target SSD capacity
- Shrink partitions before cloning:
- Open Disk Management
- Right-click partition → “Shrink Volume.”
Some advanced cloning tools can automatically adjust partitions, but not all do.
Cloned SSD Shows Wrong Size (Unallocated Space)
What happens:
After cloning, your new SSD shows:
- Same size as the old drive
- Extra space marked as “Unallocated.”
Why does it happen?
- Partitions weren’t expanded during cloning
How to fix it:
- Open Disk Management
- Right-click main partition
- Click Extend Volume
- Add the unallocated space
To Sum Up
Learning how to clone SSD is one of the most useful skills for upgrading or maintaining your computer. Cloning an SSD might sound technical at first, but in reality, it’s one of the most efficient ways to upgrade your storage without disrupting your workflow.
Instead of spending hours reinstalling Windows, drivers, and applications, cloning allows you to transfer everything exactly as it is, saving time while preserving your setup.
For most users, the process comes down to 3 key steps:
- Prepare your new SSD properly
- Use reliable cloning software
- Verify and replace the boot drive
As long as your current system is healthy, cloning is often the fastest and safest upgrade path.
FAQ on How to Clone SSD
1. How long does it take to clone an SSD?
Cloning time depends on several factors:
- Amount of data (not total disk size)
- SSD speed (SATA vs NVMe)
- Connection type (USB vs internal)
- System performance
Typical time ranges:
- 100–250 GB → 20–40 minutes
- 500 GB–1 TB → 40–90 minutes
- 1 TB+ → 1–3 hours
2. Can I clone SSD to a smaller SSD?
Yes, but only if the used space on the source drive is smaller than the capacity of the target SSD.
To make it work:
- Delete unnecessary files
- Empty recycle bin
- Shrink partitions if needed
Some advanced cloning tools can automatically adjust partitions, but not all support this feature.
3. Why is my cloned SSD not booting?
This is one of the most common issues. Possible reasons include:
- Incorrect boot order
- Missing boot partition
- UEFI/Legacy mismatch
Fixes:
- Set the new SSD as boot drive in BIOS/UEFI
- Disconnect the old drive temporarily
- Use Windows Startup Repair if needed
4. Does Windows have a built-in cloning tool?
No, Windows does not include a full disk cloning feature.
It offers:
- Backup and Restore
- System Image tools
But for true disk cloning, you’ll need third-party disk cloning software.
5. Is cloning better than reinstalling Windows?
It depends on your goal:
Cloning is better if:
- You want a fast, hassle-free upgrade
- Your system is stable
- You don’t want to reinstall apps
Reinstalling is better if:
- Your system is slow or corrupted
- You want a clean start
- You’re removing unwanted software
6. Will I lose my Windows license if I clone my SSD to a new or larger one?
No, you will not lose your Windows license or activation status when cloning your SSD to a new or larger drive on the same computer. Windows activation is tied to the motherboard, not the hard drive.