Affiliate Disclosure: This post may include affiliate links. If you click and make a purchase, I may earn a small commission at no extra cost to you.
Operating systems are complex. You can estimate the code size by the size of Windows installation files. A fresh Windows 11 install generally requires 27 GB of storage space. As you continue using your computer, it generates numerous new files to keep it running. Most of these files are important, but there are also many junk files. The operating system is intelligent enough to separate them from the important files. However, it generally doesn’t delete these files on its own. Depending on your PC usage, the number and size of these junk files can increase.
Soon, the C drive may start to appear red, which is a warning to clean it up. It is possible that it is filled with software, games, or other important file,s but there is always room for cleaning.
In this article, we are going to learn how you can free up your OS drive using simple, easy, and safe methods. So, let’s get started.
1. Uninstall unused or unwanted programs
This one is pretty obvious because software requires storage space in order to stay and work on your computer. So, if you have many of them but you are not using them, it is good to free up some space by uninstalling them. To do so, you can follow the procedure below.
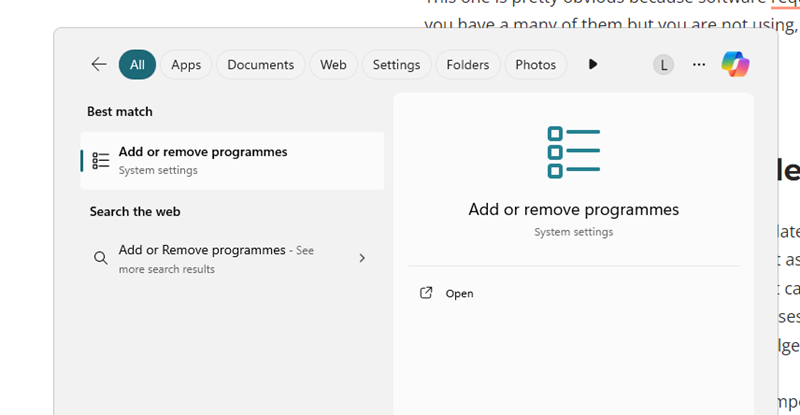
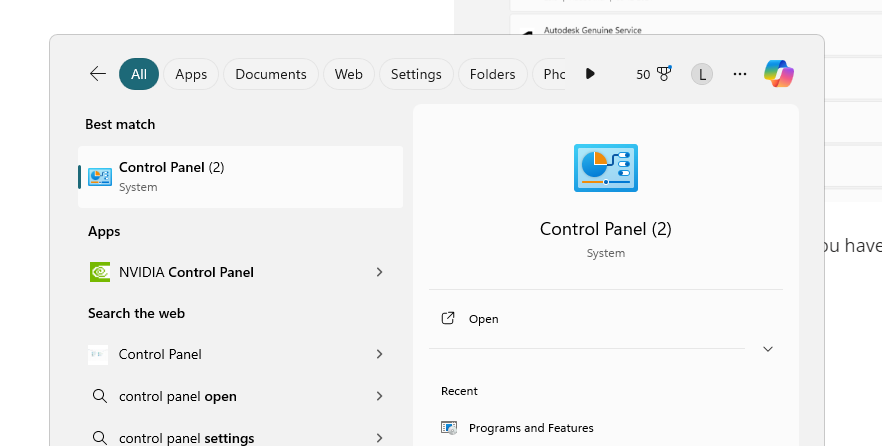
- In the Windows search bar, search for Add or Remove Programs and enter the menu.
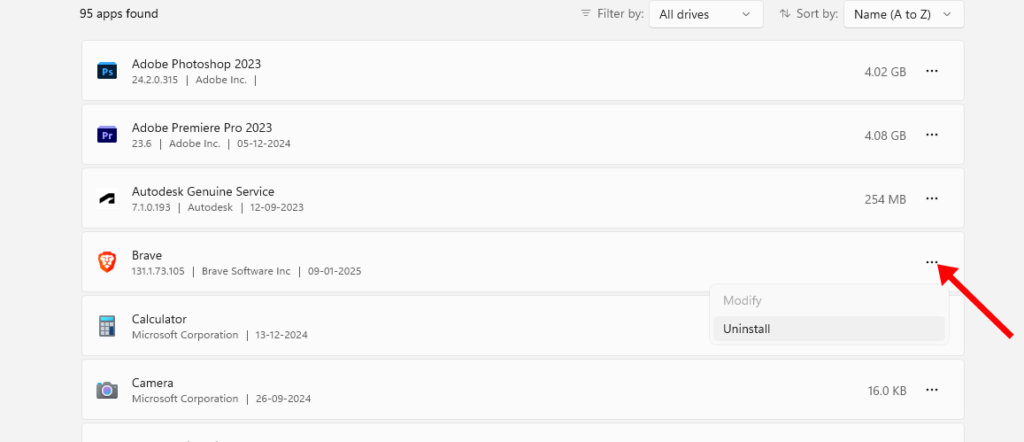
- Click on the three dots in front of the program you want to remove and then click Uninstall. Proceed with the uninstallation process.
- Another method is to go to the control panel. For this, you have to search for Control Panel in the Search bar and enter the menu.
- Make sure Large Icons are selected in the top right corner and click the Programs and Features option in the control panel.

- Uninstall the programs you don’t generally use.
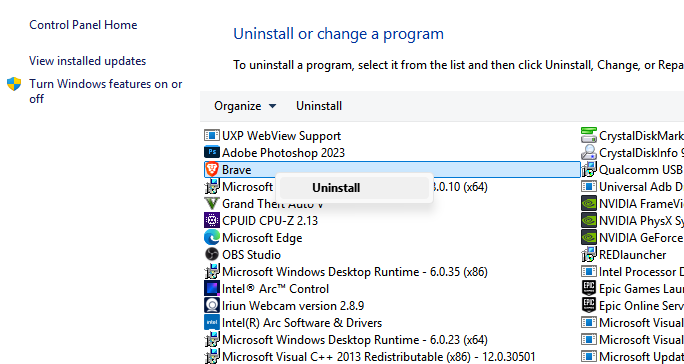
This should surely free up a lot of space if you have software ready for removal. In the same process, I uninstalled 12 apps and games from my computer and freed up around 50 GB of space.
2. Delete Temporary Files
Over time, many temporary files can accumulate, easily filling the drive with gigabytes of data. Inevitably, these files will always be created, and they are important as they generally serve for ongoing processes. Some processes or updates might ask for system restarts. In that case, as well, the files are temporarily stored inside the temporary folders. For crash recovery, diagnostic processes, and testing environments, the temporary files can be utilized. But if you think your system is fine and do not indulge in these kinds of things, you are good at deleting the temporary files.
Now, there are two methods to delete the temporary files. We will discuss both.
Deleting temporary files through Windows Storage settings
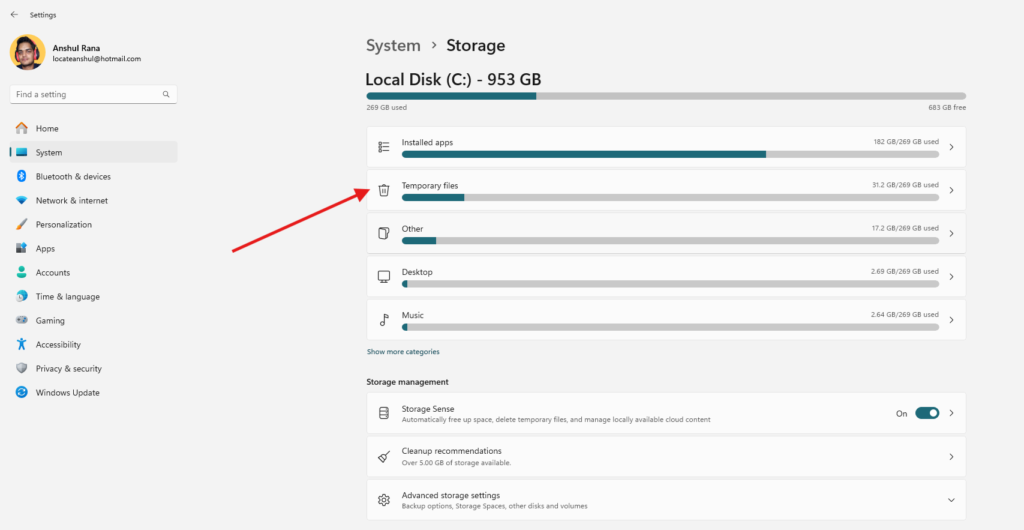
- Press the Windows+I key to enter the Windows settings and click the System tab.

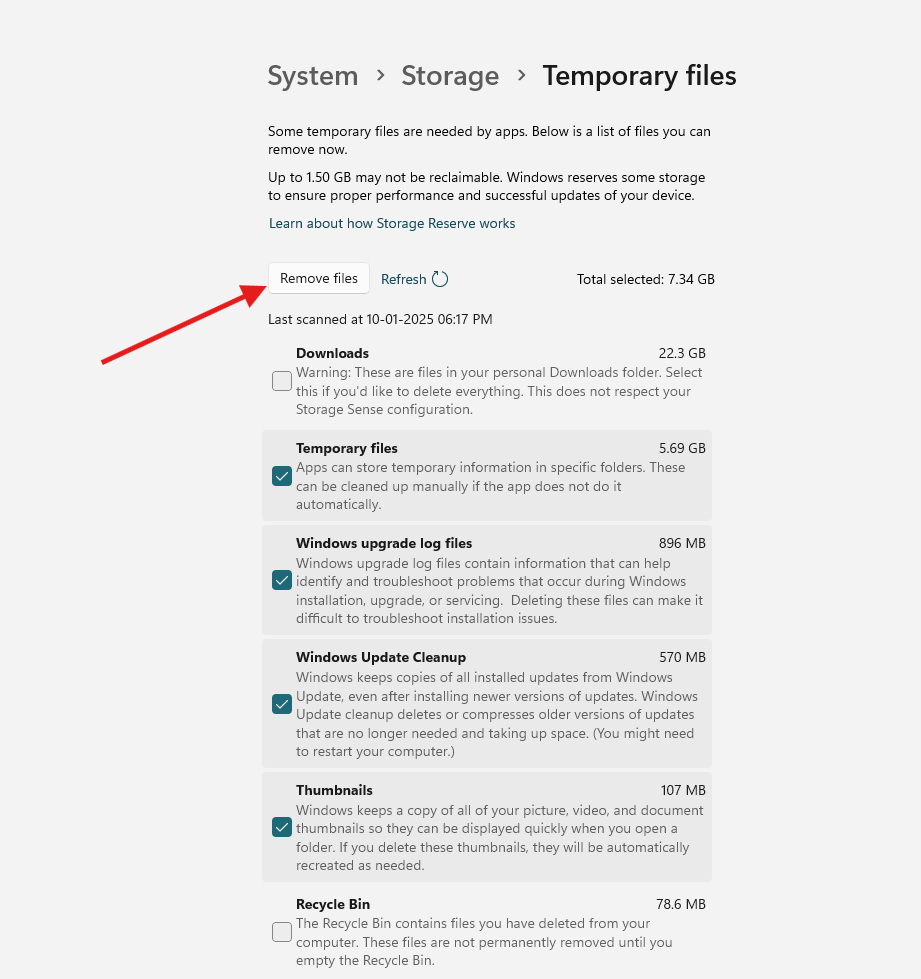
- Inside the storage menu, click the Temporary Files section to open the temporary files menu.
- Tick the folders or things that you are fine with removing and click Clean Files.
Deleting temporary files through the Disk Cleanup menu
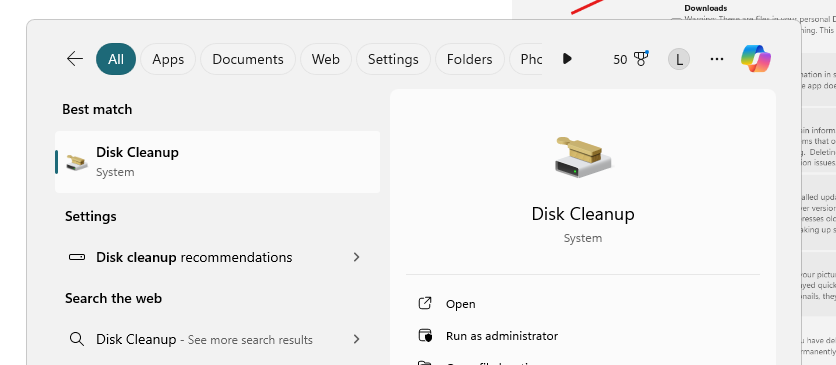
- In the Windows Search bar, search for Disk Cleanup and open the Disk Cleanup menu
- Choose your C drive or the preferred drive for cleaning and hit Ok.
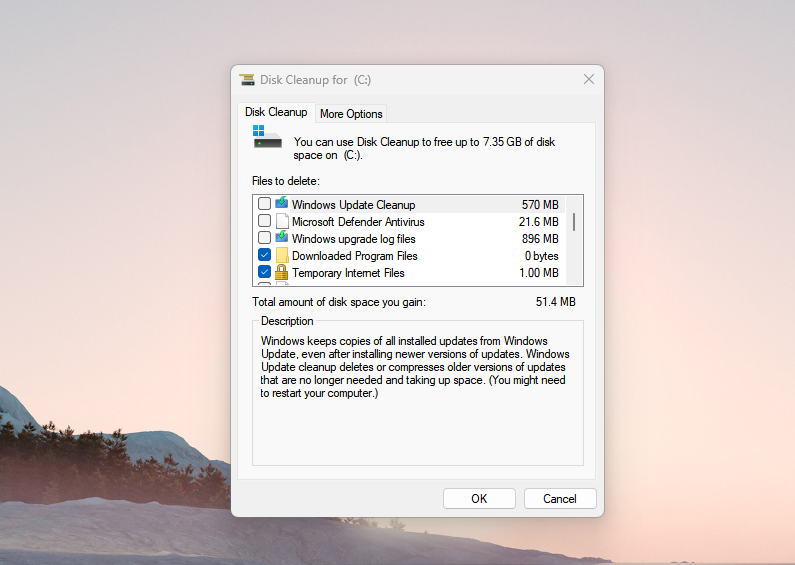
- Now, choose the folders and things you want to clean by checking them. You can also click Clean System Files to get more cleaning options like Windows update files.
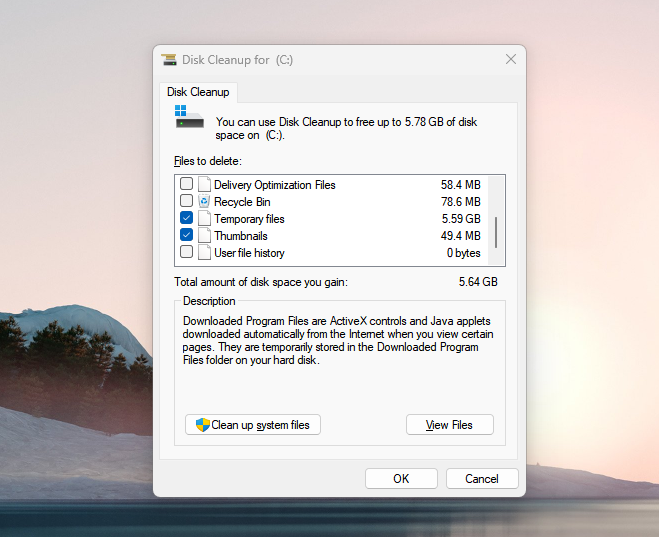
Once, you are done selecting the files to delete, click Ok and wait for the deletion.
Deleting through Run
There are two types of temporary data folders in Windows i.e. temp and %temp%. With the processes we followed above, the temp folder would have been deleted. But, will try to check it again along with the %temp%. The temp folder is typically found inside with C:/Windows folder and holds the temporary files created by Windows services, applications, and processes. It generally has system logs and service-related data.
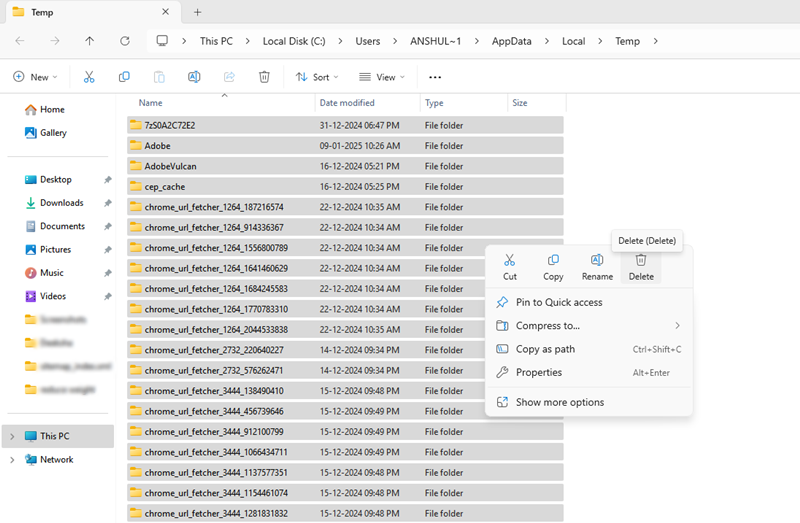
The %temp% folder and its content are user-specific and it is found in the C:\Users\\AppData\Local\Temp. This folder will have temporary files generated by different apps under the logged-in users. These files could be browser cache, user-installed applications, and session-specific data. To delete these folders, we are going to use the Run dialog.
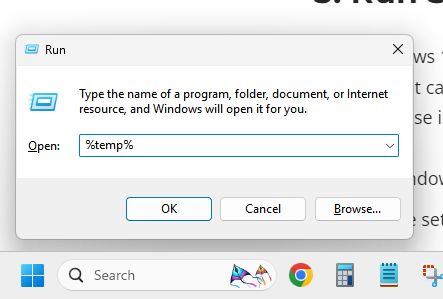
- Press the Windows + R keys to open the Run dialog.
- Inside the Run dialog, type temp and hit enter. The Temp folder will open automatically.
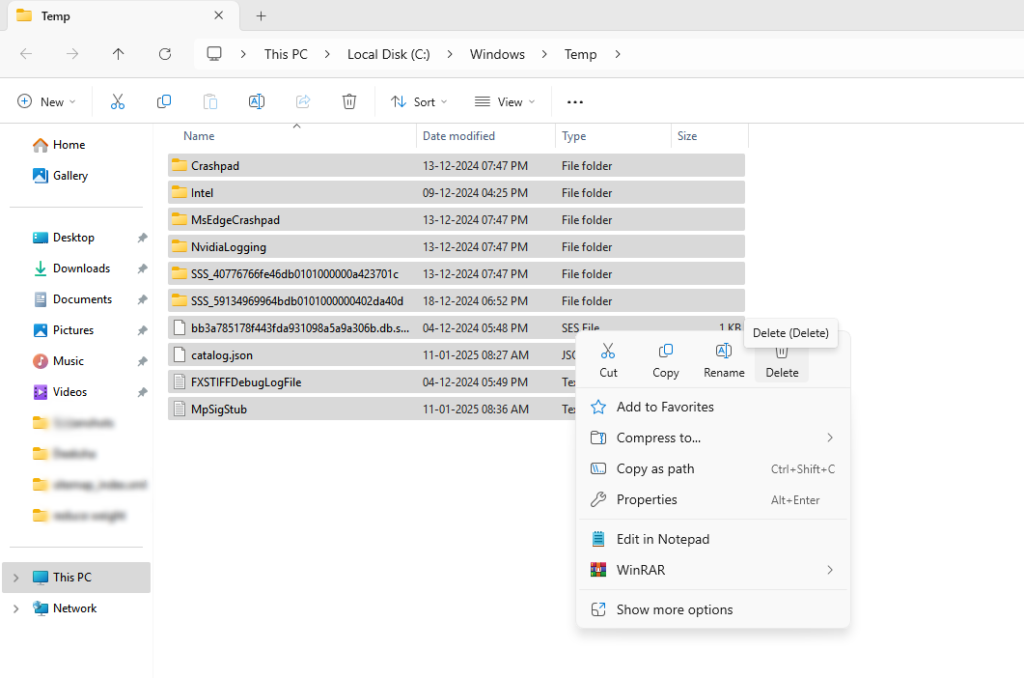
- Select all the files and folders by pressing Ctrl + A. Right-click on any file/folder and click Delete. If the system demands administrator permission, give it.
- For the %temp% folder, type %temp% in the Run dialog and hit Enter.
- Again, a new folder will be opened and you have to delete all its content in the same manner. Select all the things by pressing Ctrl + A and delete everything.
With this, you can easily empty a lot of space from your system which was filled without any special need. My system had around 30GB of temporary files, recycle bin data, and download files stored in it.
3. Delete Prefetch Files
Prefetch files are created by the operating system to store information about the programs. The purpose of .pf files is to improve the loading speed of programs with information about the resources they use during startup. When you launch an application or game, Windows first looks for the .pf file of that program, and if it is available, it loads that specific program or game in a much efficient and quicker manner. Deleting the prefetch folder will surely cause some performance drop for some time but it will clear up a lot of space.
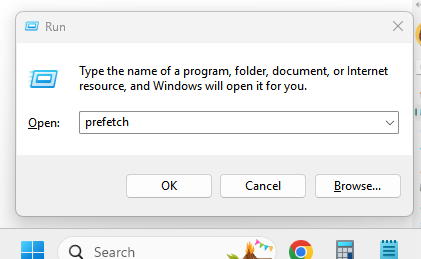
- Open the Run dialog again by pressing the Windows + R keys. Type prefetch and hit enter. You can access this folder at this path as well: C:\Windows\Prefetch.
- A new folder with all the prefetch files will open. You’ll have to delete all these files. To do so, click any file and then press Ctrl + A. Then press delete and continue with the deletion.
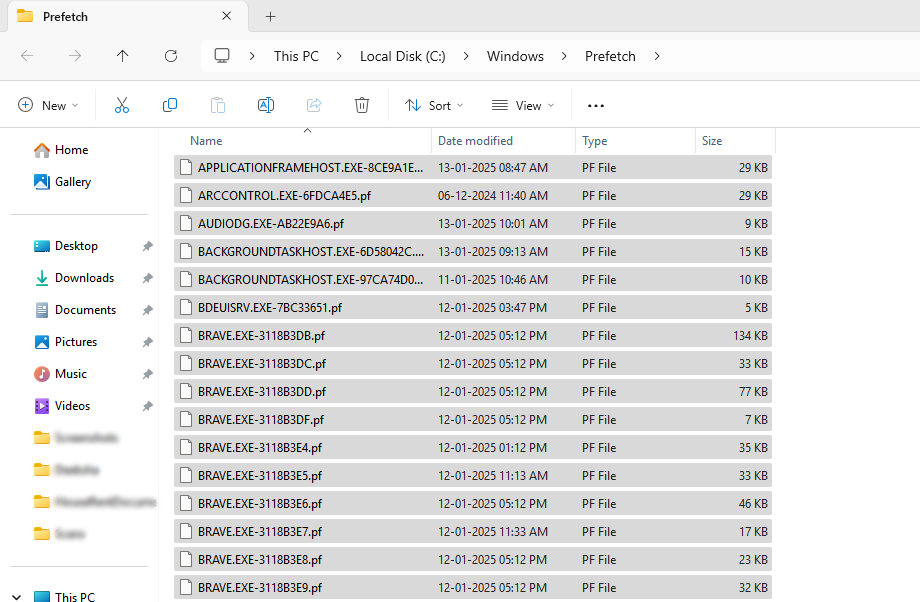
The size of these files isn’t big. But over time, they can accumulate in big numbers. If you want, you can leave some files of any software that you use the most and don’t want to compromise with its performance. Otherwise, it is safe to delete this folder because it is going to be created back soon.
4. Run Storage Sense and keep it turned on
Both Windows 10 and Windows 11 have built-in features to keep the storage clean and optimized for performance. If turned on, it can clean up temporary files, old installation files, thumbnail cache, temporary internet files, log files, etc. Storage Sense isn’t turned on by default. So, you’ll have to enable it manually, and here is the process for the same.
- Go to Windows Settings by pressing the Windows + I key
- Inside the settings, choose the System section and click Storage
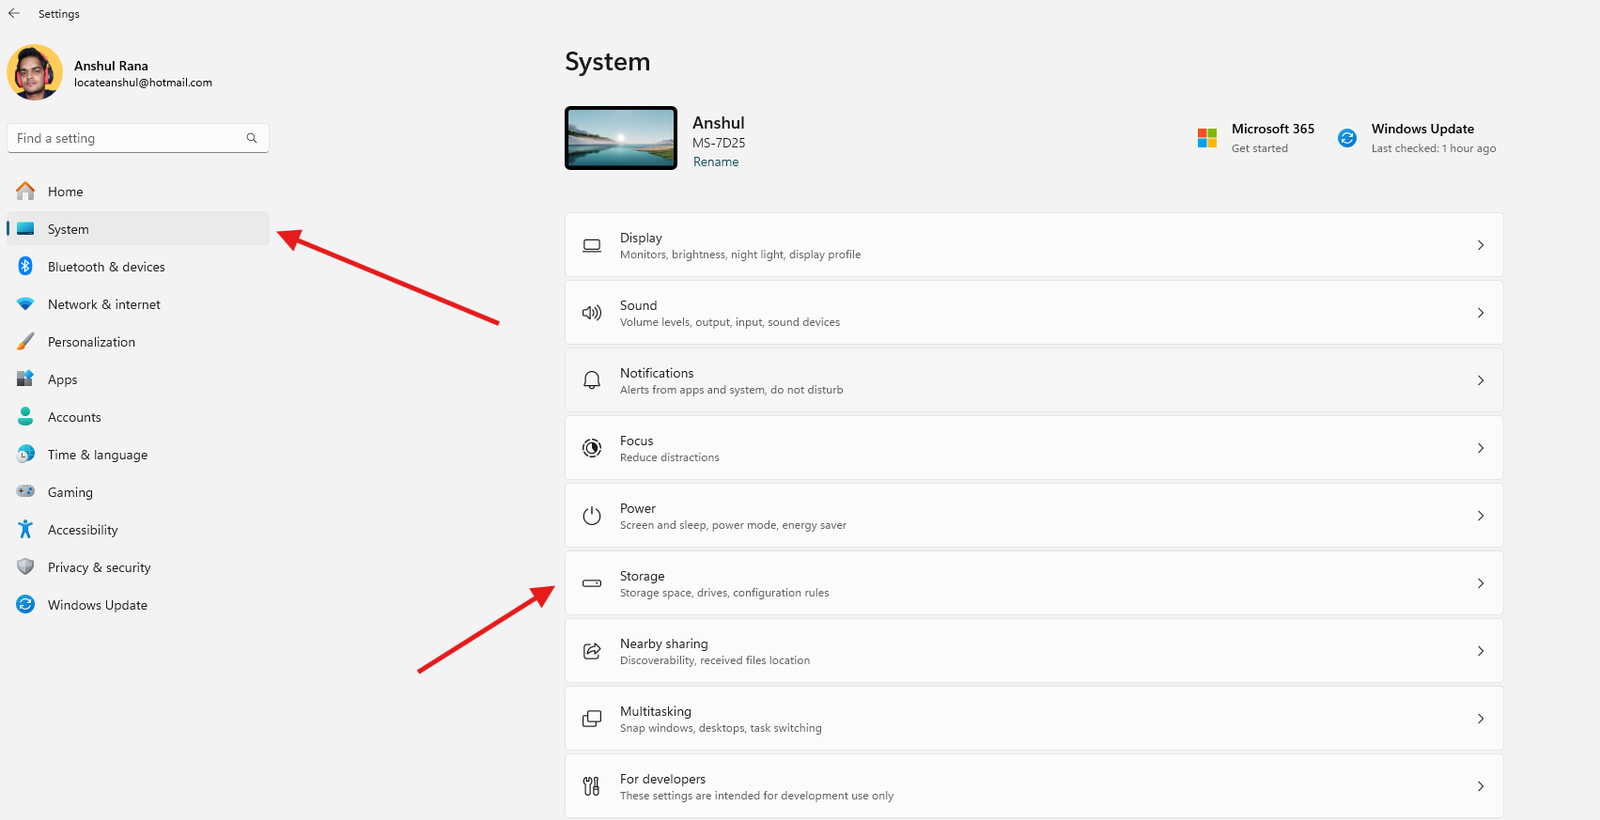
- Inside the Storage section, turn on the Storage Sense option by toggling the button On.
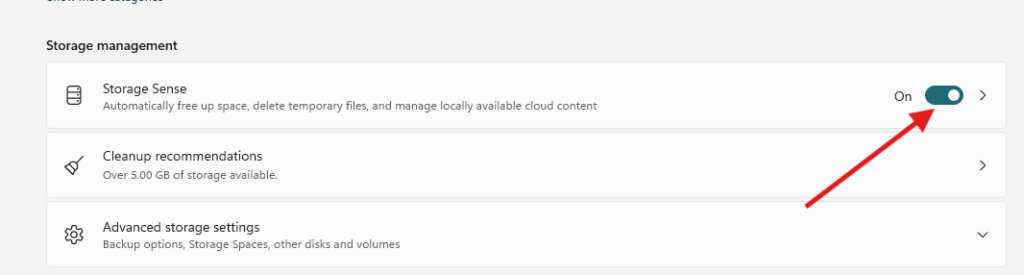
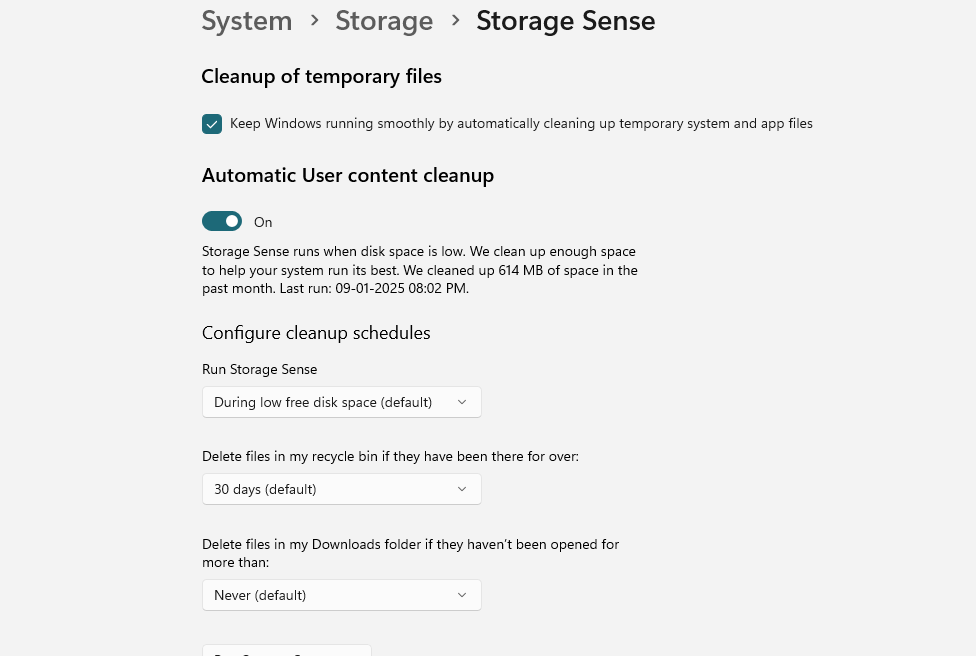
- You can also click the Storage Sense option to configure the settings as per your requirements. This will include setting up the cleanup frequency for the Recycle bin and download folder.
5. Delete Large or Unused Files
You’ll have to go through your system files to find and delete the unused files. But here is the method to find the big files specifically and see if they are of any use to you. Deleting these files can free up a significant amount of space at once.
- Open the File Explorer and type size:>1GB in the search. You can change the file size if you want. In this case, Windows will find all the files or folders having the size of more than 1GB.
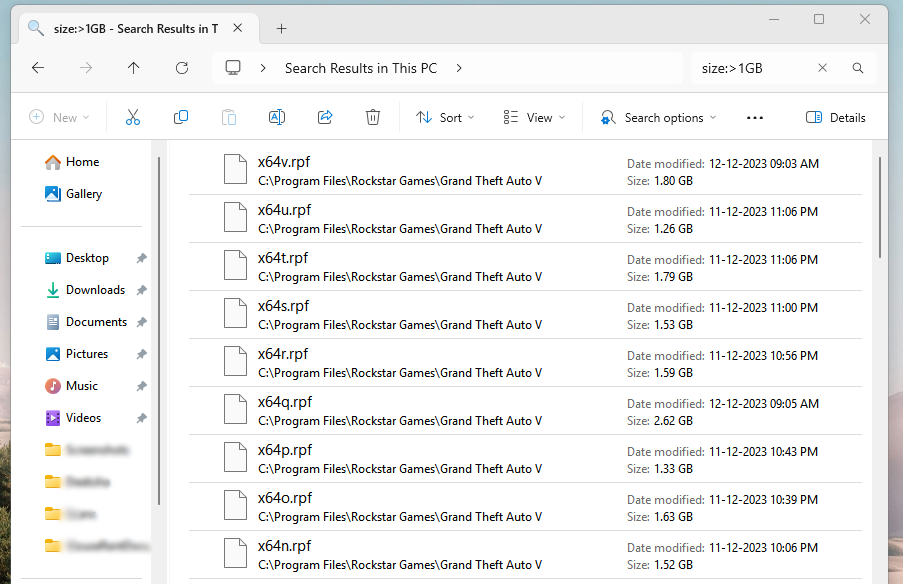
Note: With this search operator, Windows will find files from everywhere, including the program files. Delete only the files that you think are safe to delete. In my case, these all are game files and I am not going to delete them.
Storage Sense can also take care of these big and unwanted files, which we have already talked about and enabled.
6. Compress Files or Enable Compact OS
Enable compression only if you have a serious need to reduce the size of your C drive. Although the process is done automatically without any manual intervention, it will have some overhead on the CPU and RAM. Here is the process of doing so.
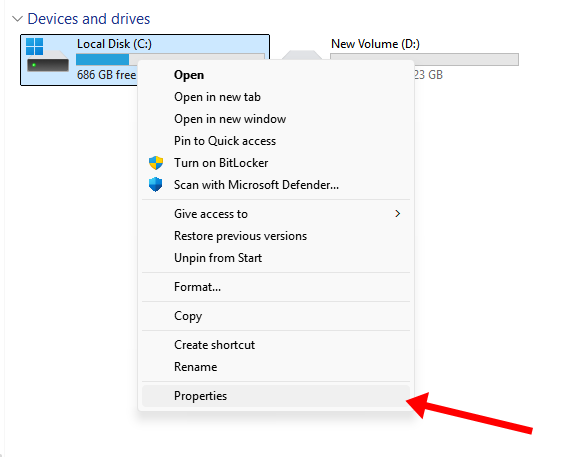
- Right-click on the C drive or any drive you want to enable compression on. Click the Properties option.
2. Now, tick the option that says “Compress this drive to save disk space“.
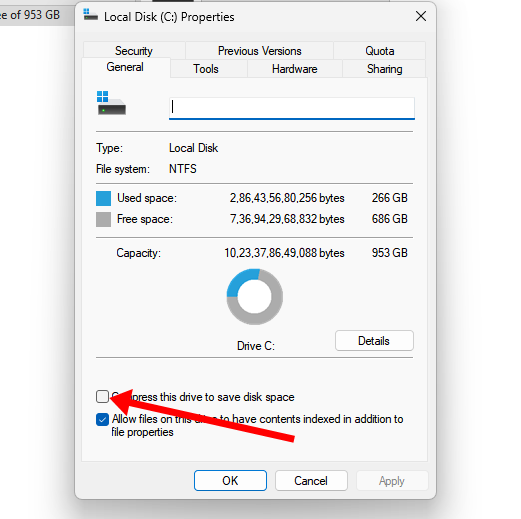
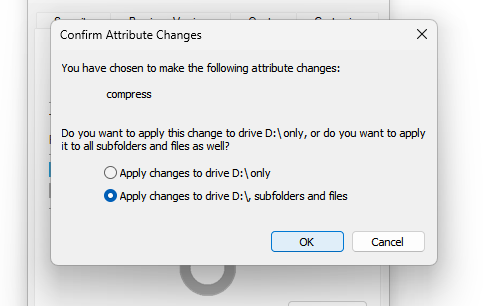
- Now, you have the option to just compress the drive or its subfolders as well. For simple compression with minimal storage savings, you can choose to apply the changes to a specific drive only. However, for extensive compression and higher storage saving, you can choose the section option to add files and subfolders.
- Depending on the size of your drive and the data inside it, the compression can take a good amount of time to complete.
- Once the compression is enabled, you’ll see the compressed icon with all the files. It would look like this.
The compression ratio and how much data you save will depend on the type of files as well. Text, video, audio, image, and other data files tend to compress more compared to the already compressed, encrypted, and binary data files.
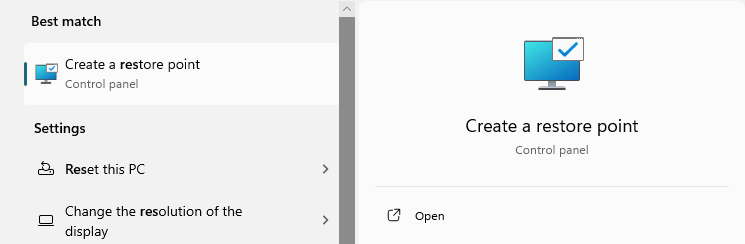
7. Remove Old System Restore Points
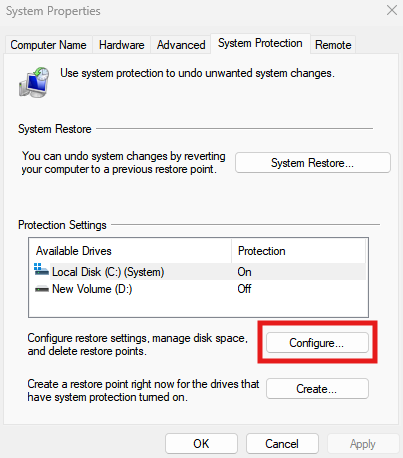
If you have configured automatic system restore, the system will keep creating restore points. There are two methods to delete these files. The first one is to completely delete the restore point and remove all the restore files from your computer. This method isn’t safe if you really want a backup for your data in the future. To do this, however, you’ll have to go to the system properties menu, specifically in the system protection tab.
- Click Configure and a new menu will open.
- There, click Delete.
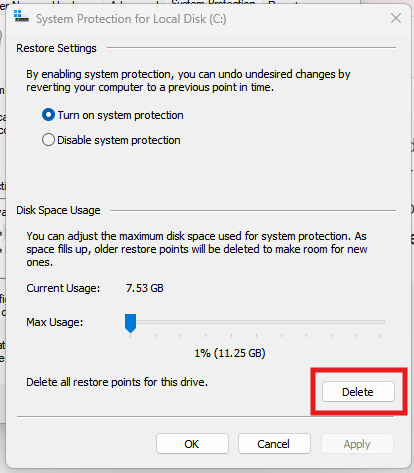
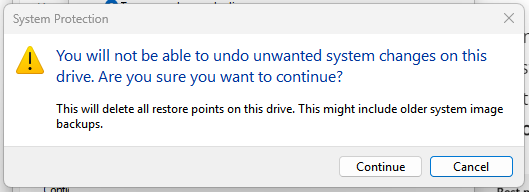
- Upon clicking Delete, the warning message would say that you lost all the restore points and the data backups available.
Remove only the older system restore points (Recommended)
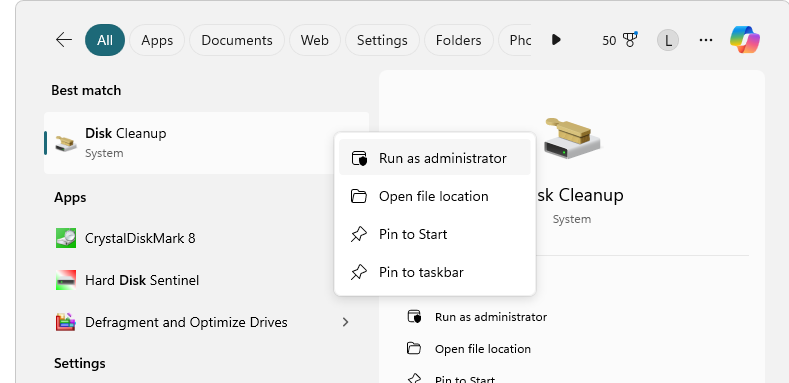
- Now, the safest way to only delete the older restore points is by again using the Disk Cleanup utility. Make sure to open it as an Administrator.
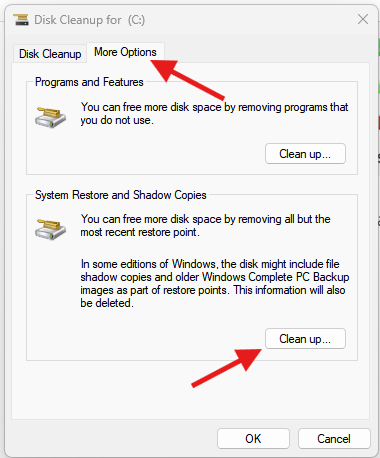
- Choose the drive you want to clean. In this case, we are going to choose the C drive.

- In the new Cleanup menu, choose the More Options tab and click Clean up under the System Restore and Shadow Copies section.
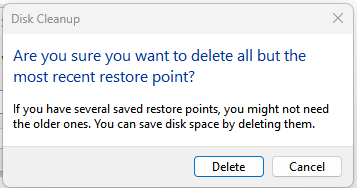
- In the next dialog, you’ll see the warning message and the delete button. This message states that it will delete only the older restore points, not the latest ones.
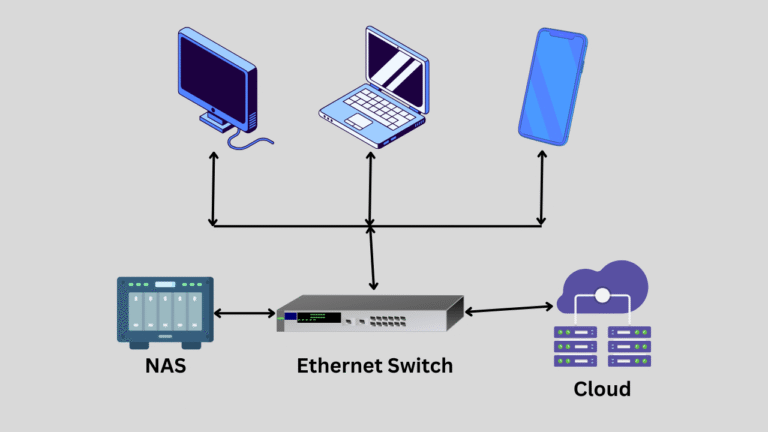
8. Migrate Personal Files to External Drive or Cloud
This one is a simple, easy, and often cheap method to empty your main system drives and put the load on the external drive. You can get a good external SSD or Hard Drive and move your files there. Another solution that will cost you some extra money is a good cloud storage space like Google Drive or OneDrive. I do not have to explain these things to you because they may vary depending on the cloud provider you are choosing. Moving files from your computer to other drives or the cloud is easy.
I personally have the habit of keeping an external system backup along with a separate drive for important personal data. This keeps my C drive generally empty with only the operating system, apps, and games files on it.
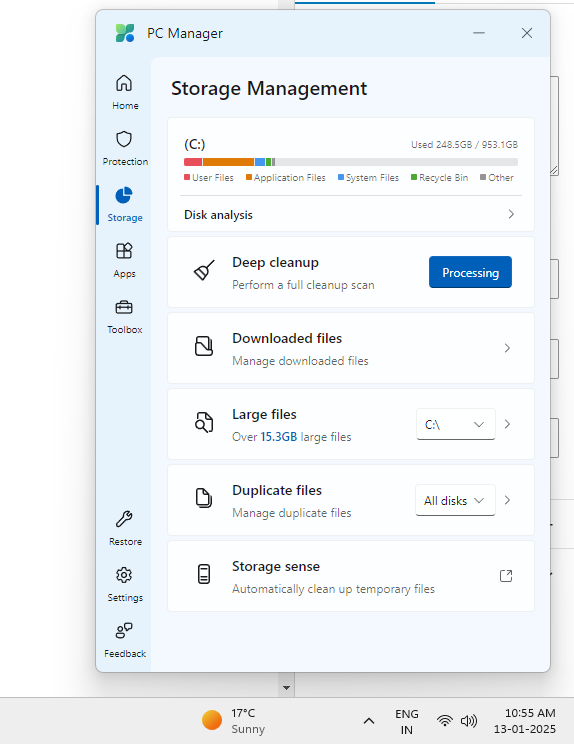
9. Use Microsoft PC Manager
There are many “storage cleaners”, “system boosters”, “optimizers”, and “junk removers” in the market. I personally don’t like using them but one that recently caught my attention is Windows’ own software caller PC Manager. Because it is Windows’s product, it properly integrates into the operating system. For example, it has a separate protection tab where you can access the most important security and threat protection features of Windows. When you click anything, it doesn’t tell you to install another program of that brand. It just takes you to that settings page itself. Also, there are no “special features” available only for paid users because there is no paid plan.
For storage, it has many features that will automate most of the stuff that we discussed above. Let’s see how you can use it.
Download and install Windows PC Manager. Once installed, it will appear on the right side of the taskbar (check the hidden items).
- Select the storage tab and click Scan.

- This scan will show potential cleaning opportunities, and you can proceed with the cleaning with the Clean button.
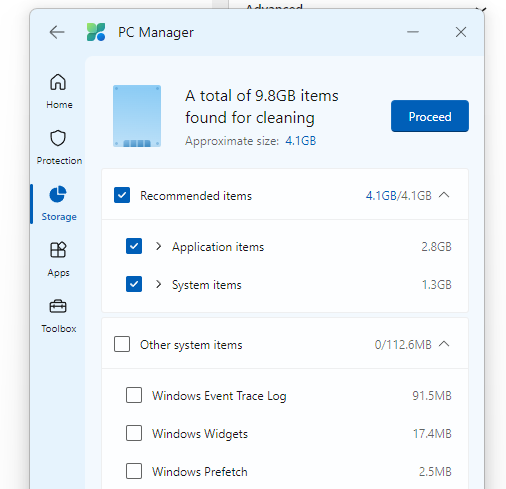
- Click on the storage tab again and use other cleaning features like deleting large files, duplicate files, or downloaded files.
Conclusion
With all these steps, I was able to clear up around 200GB because I did it rigorously. However, I believe most computers would have some room for clearance. Still, if your drive is full, you might have a lot of files stored or many programs installed. In that case, you may have to upgrade to a new drive or move the files to another drive.
I hope this helps!