Affiliate Disclosure: This post may include affiliate links. If you click and make a purchase, I may earn a small commission at no extra cost to you.
RAM plays a vital role in your computer’s overall performance. A slow or low RAM can result in system lags, slow loading, and system hangs. Laptops generally come with sufficient RAM and speed, depending on the CPU. However, most laptops have room for some kind of upgrade. Most low-end and even mid-range laptops will have one empty slot for RAM upgrades. If your computer has 8GB of RAM, it is most likely using a single slot, leaving one free.
In other cases, both slots might be equipped with two SO-DIMM memory chips to utilize the dual-channel memory bandwidth. In this case, you may have to replace the modules with higher storage capacity or speed. But checking for the motherboard’s highest supported capacity and speed is important before you do any upgrade.
If you want to upgrade the RAM, it is essential to check if there is a free slot on the motherboard. Most laptops have two RAM slots, and you can check whether a slot is empty by opening the computer or using the task manager. We will discuss all of it in the upcoming sections.
Note: We are referring to Windows Laptops only (not MacBooks). Additionally, MacBooks manufactured before 2015 had removable RAM sticks. All modern MacBooks have soldered RAM, which a specialist can upgrade.
How to Check for an Empty RAM Slot in Your Laptop?
There are two primary methods to confirm whether your laptop has an empty RAM slot or if it has more than one.
1. Using Task Manager
- Right-click the taskbar in Windows and select Task Manager. Alternatively, you can search for the Task Manager in the Windows search bar.

- In the Task Manager menu, go to the Performance tab and select the Memory section.

In the performance statistics section below the graph, check the ‘Slots Used’ section and see if any slots are empty. In my case, ‘2 of 2’ is written, which means both available RAM slots are equipped with two RAM modules. If there is an empty slot, one of the two would have been written there.
2. Opening the laptop
This is the direct way to see if the laptop has an empty slot or not. The process of opening a laptop is discussed in the article below. So, you can go directly there if you want.
How to Choose the Right RAM for Your Laptop?
1. Match Specs with the existing RAM
If you only want to upgrade the RAM and keep the existing one, it is best to check the specifications and purchase the same RAM or one with the exact specifications. I recommend searching for your laptop’s name on Google and visiting its official website. There, locate the specs or technical specifications sections where the memory specifications would be listed.

Alternatively, if you can open the laptop or have already opened it, just look at the memory stick and see its specifications on the label. You can just get the same RAM by its product number or another one with the same frequency and DDR variant.

Your laptop specifications may indicate support for faster and higher-frequency RAM, but the laptop uses slower RAM with the same DDR variant. In this case, if you install RAM with a higher speed, both the RAM sticks will work at the same speed as the slower RAM. For example, the Legion 5i 14th Gen laptop (whose specs are shown above) has memory support for up to 32GB 5600MHz DDR5 RAM. All models in this range come with 16GB of 5600MHz DDR5 RAM. Now, if I install a new 4800MHz 16GB RAM, both will work at 4800MHz.
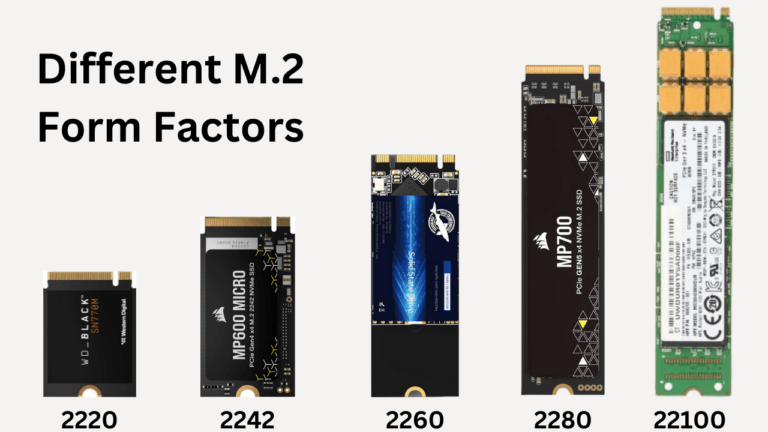
2. Form Factor
As long as you purchase the correct DDR variant based on your laptop’s specifications, you will have no issues with the form factor. No DDR variants (DDR1, DDR2, DDR3, DDR4, and DDR5) are physically compatible with each other.
However, keep in mind that desktop RAMs have a different form factor, and you may mistakenly buy the wrong one for your laptop. Although the DDR versions will be the same, laptop RAM (SODIMM) has a different form factor than desktop RAM (DIMM).

Laptop RAMs use SODIMM (Small Outline Dual-Inline Memory Module), which is roughly half the size of the DIMM (Dual Inline Memory Module) used in desktops. The pin count of these RAMs is as follows:
- DDR1: 200 pins
- DDR2: 200 pins
- DDR3: 204 pins
- DDR4: 260 pins
- DDR5: 262 pins
3. DDR Variants
Now comes the most crucial part. Once you have confirmed the supported DDR variant by examining the specs or the existing RAM, you can purchase any RAM of the same variant. Unlike desktops, you don’t have to worry about two DDR variants (supported by the CPU) and check for the motherboard’s memory specs to get the correct RAM. Laptops will help only one DDR variant, so you can only upgrade to higher performance and capacity if there is room for it.
4. Frequency and Latency
Now, matching the frequency and latency is crucial to maximizing the performance of both your RAMs. As we discussed above, if the laptop already has a RAM stick with the highest supported performance, it is best to choose another one with the same specs. The speed of the RAM with the lowest frequency will be adjusted as the default speed for both RAMs. The same goes for the latency numbers. Higher latency means slower response times. Two RAMs with different latency numbers will work on the same latency as the one with the higher latency.
This means if you want to upgrade the RAM to a higher frequency (if the laptop supports it), you’ll have to upgrade all the RAM sticks at the same time. Again, the same applies to latency.
The next point concerns the laptop’s memory specification and whether it is overkill. If you have just checked that your computer supports DDR5 RAM at 4800 MHz, you should aim to stay within this frequency range. Although your laptop can support a higher DDR5 frequency (e.g., 5600 MHz), the RAM will still operate at 4800 MHz.
5. Capacity
Ensure that you match the RAM capacities of both RAM sticks and stay within the maximum supported capacity of your laptop. Now, some people would argue that laptops support different RAM capacities as long as they are of the same DDR variants. This is true, but they often overlook how dual-channel memory works in computers.
Importance of matching capacity to utilize dual-channel memory
If your laptop has dual-channel memory support, the system won’t be able to use it properly without the same size of memory chips. Depending on the RAM size, your laptop may enter ‘flex‘ mode. In this mode, the system will utilize an equal amount of both RAM sticks in dual-channel mode. The remaining memory space in the larger memory will operate in single-channel mode.
For example, if you have an 8 GB stick and a 4 GB stick, 4 GB from each will run in dual-channel mode, while the remaining 4 GB from the 8 GB stick will run in single-channel mode.
Another reason mismatched capacities can lead to reduced performance is that the memory controller may operate in a more limited mode. Different sizes require more complex memory management by the controller, resulting in additional overhead.
However, this wouldn’t be a problem if your laptop had single-channel memory support. In that case, you can install two RAM sticks of different capacities. However, it is still recommended to match the capacity of two RAM sticks as well.
6. Brand
It is advisable to choose a reputable brand when selecting RAM. Without RAM, your system wouldn’t even boot up. Therefore, ensure that you obtain a high-quality RAM from a reputable brand. However, for upgrading, it is good to find the same model of RAM from the same brand that is already installed on your laptop.
How to Install RAM in your Laptop?
Ensure that you disconnect any power cables or other devices connected to the laptop before starting the installation.
Important Note: Opening your laptop and upgrading the RAM generally doesn’t void the warranty, but check your manufacturer’s guidelines before proceeding. Additionally, a minor physical impact to the internal component or improper handling can easily damage your laptop. If you’re unsure about performing these steps, please have it done by an expert.
Not all laptops open the same way and have the same circuitry inside. So, there can’t be a universal installation guide for anything. However, most laptops in the market are similar to the HP 15-Series laptop that I own. So, I believe this is a “kind of” universal laptop RAM installation guide. I will also provide details about what you can expect from other laptops.
1. Unplug the battery (if external)
If your laptop has an external battery, just unlock it and take it out.

2. Open the Back Panel (if required)
Some laptops (generally older ones) have small covers on the back below which the RAM sticks are installed. If that is the case for you, you can simply follow the instructions for installing the RAM in the 5th step.
However, if your laptop has a fully covered back panel, take a small screw and start opening it one by one. Most laptops can be opened with Phillips #0 (PH0) or #1 (PH1) screwdriver. However, don’t force it if it doesn’t work. Find the right screwdriver and check the laptop service manual for confirmation. Open the screws one by and once they are opened, pry the back panel out with a prying tool. You can use an old credit card as well if it works. I found nails to work pretty well once you have got some room in the corners. So, start prying from the corners.

There would be some plastic locks holding the panel in its place. If it is being opened for the first time, it is going to take some force and time to open it.

3. Unplug the battery (if internal)
If the battery is internal, it will have a connector connecting to the motherboard. Remove the connector before proceeding. It is good now to wear an anti-static wristband if you have one.

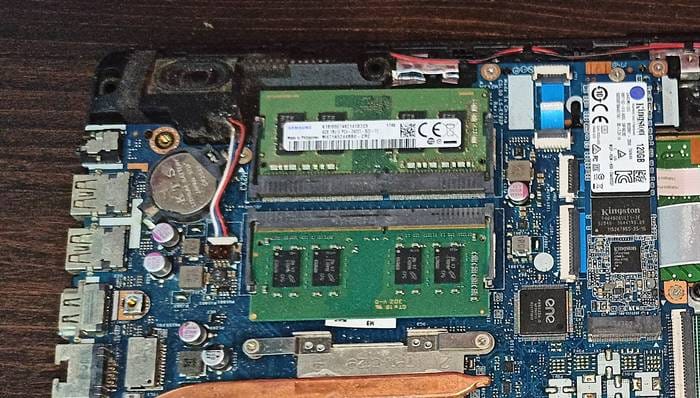
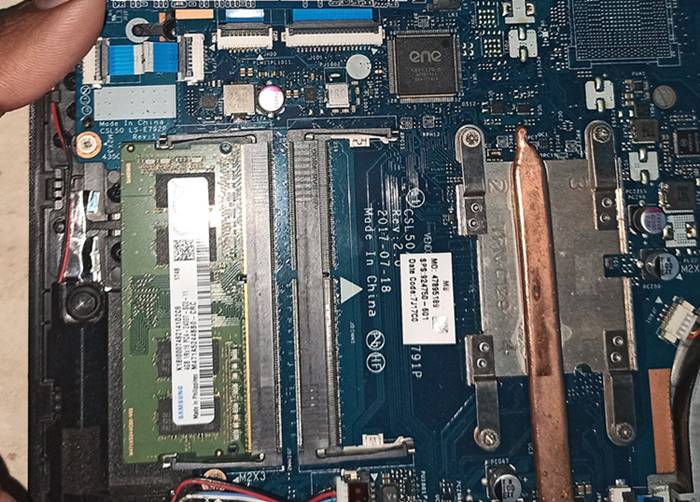
4. Locate the SODIMM memory slot
Now, locate the memory slots. There are generally two types of slots, i.e., one over another (stacked/vertical slot) and separate ones. They will look like these.

5. Install the RAM chip
Installing the RAM is pretty easy. You just have to push the pins at around a 30° angle inside their slot.

Once it’s inside, push it towards the ground until it gives a click sound and lock it in place. That’s it. In the case of a stacked slot for two RAMs (one over the other), install the RAM in the lower slot first, and then in the top slot.

6. Reconnect the battery and put the back panel on
If the battery is internal, simply reconnect it and tighten the back panel as before. That’s it with the installation.
7. Test if the RAM is recognized and working
The advantage of RAM installation in laptops is that you don’t need to take any additional steps to keep it running. If properly installed, the computer will recognize and display the total available memory in the Task Manager. You can also go to Windows Settings > System > About to check if the new memory stick has been recognized.
I hope this helps!