Affiliate Disclosure: This post may include affiliate links. If you click and make a purchase, I may earn a small commission at no extra cost to you.
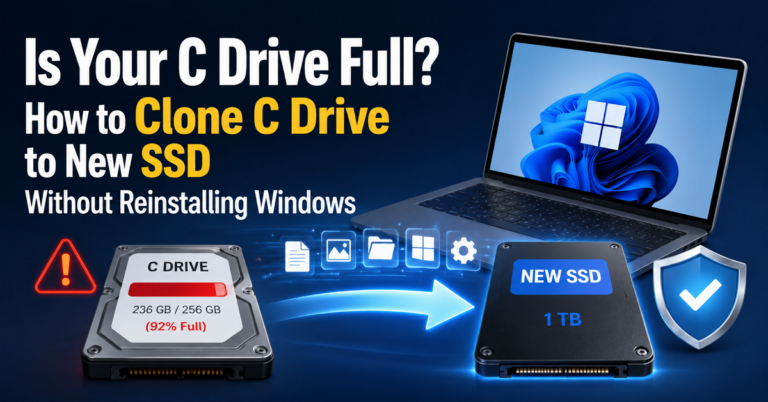
Upgrading an M.2 SSD to a new or larger M.2 SSD is one of the easiest ways to boost your PC’s performance and storage space, but the idea of reinstalling Windows, apps, and all your settings from scratch can feel like a deal-breaker. That’s where cloning comes in.
By cloning your M.2 SSD, you can move everything from your old drive to a new one exactly as it is—system, files, apps, and even boot settings—without breaking your workflow. Whether you’re switching to a faster NVMe drive or simply upgrading to a larger capacity, the process can save you a lot of time and effort.
In this guide, we’ll walk through how to clone M.2 to M.2 SSD step by step, covering both NVMe and SATA drives, and outline the key checks before and after the process to ensure everything boots smoothly.

When Do You Need to Clone an M.2 SSD?
Most people start thinking about cloning when they’re upgrading to a larger SSD, replacing a failing drive, or simply trying to move everything to a new system without going through a clean install. Cloning is basically a shortcut that keeps your system exactly as it is.
It’s usually about one of these situations:
- upgrading to a larger SSD
- replacing a failing drive
- avoiding a full Windows & apps reinstall
- migrating everything without data loss
Can You Clone M.2 to M.2 SSD?
Yes, you can clone an M.2 SSD to another M.2 drive in most cases. The only thing to keep in mind is that “M.2” doesn’t define how the drive works; it only describes its physical form. Compatibility depends on both the interface (NVMe or SATA) and whether your device supports it.
1. M.2 vs NVMe vs SATA
M.2 refers to the physical size and connector style of the drive. NVMe and SATA, on the other hand, describe how the drive communicates with your system. In simple terms, NVMe M.2 drives are faster and use PCIe lanes, while SATA M.2 drives are limited by older SATA speeds. It helps to separate these concepts:
- M.2: the physical form factor (how the SSD looks and connects)
- NVMe: a high-speed protocol that uses PCIe
- SATA: an older, slower protocol
In practice, this means there are two types of M.2 SSDs: M.2 NVMe vs M.2 SATA
- M.2 NVMe (faster, more common today)
- M.2 SATA (slower, mostly found in older systems)

2. Key Compatibility Checks
Before cloning, make sure the new drive matches your setup. In most cases:
- Match the interface: NVMe → NVMe is ideal; SATA → SATA is safest
- Check motherboard support: some M.2 slots only support NVMe, others support both
- Check the keying: most NVMe drives use M-Key, while SATA may use B-Key or B+M
Also, pay attention to size (length). The most common format is 2280 (22mm wide, 80mm long), but shorter sizes like 2242 or 2260 are also available—especially in laptops.
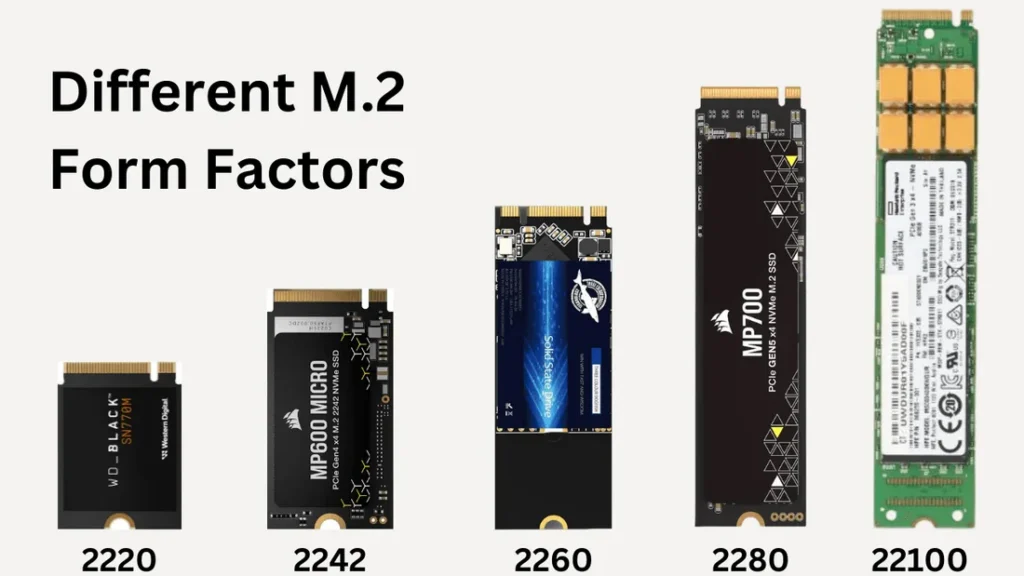
💡Essentially, when buying, you choose between M.2 NVMe (high-performance) and M.2 SATA (standard-performance), and ensure the size (usually 2280 – 22mm wide by 80mm long) fits your slot.
Things to Check Before Cloning (Don’t Skip)
Before you start cloning, it’s worth taking a minute to go through a few basics. Most cloning issues don’t come from the process itself—they come from small setup mistakes that are easy to avoid.
- Turn off BitLocker or device encryption to prevent boot or access issues after cloning
- Make sure the new SSD is detected in Disk Management
- Do not initialize the new SSD manually—the cloning software will handle it
- Back up important data (just in case, even though cloning is generally safe)
These small steps can save you from the most common cloning failures later on.
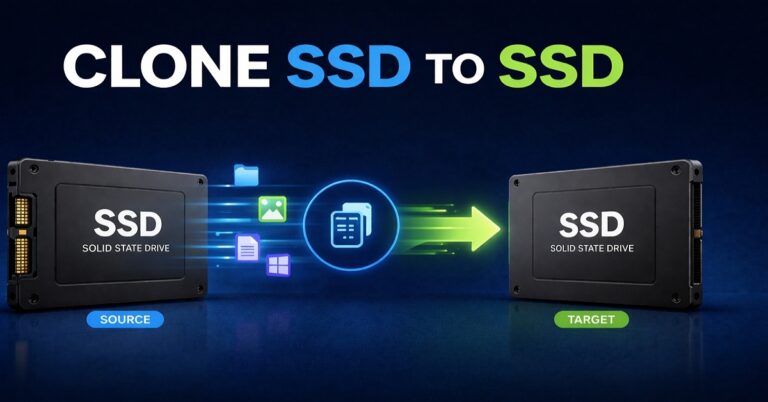
How to Clone M.2 SSD to M.2 (Best Method)
The easiest and most reliable way to clone an M.2 SSD is to connect both drives simultaneously, either by installing the new SSD in a second slot or by using a USB enclosure. Once both drives are visible to your system, the rest is straightforward.
Step 1. Connect the new M.2 SSD
If your motherboard has an extra slot, install it directly; otherwise, use a USB enclosure to plug it in externally.

Step 2. Launch cloning software
Disk cloning software like Macrium Reflect or Clonezilla works well, depending on how comfortable you are with the interface.
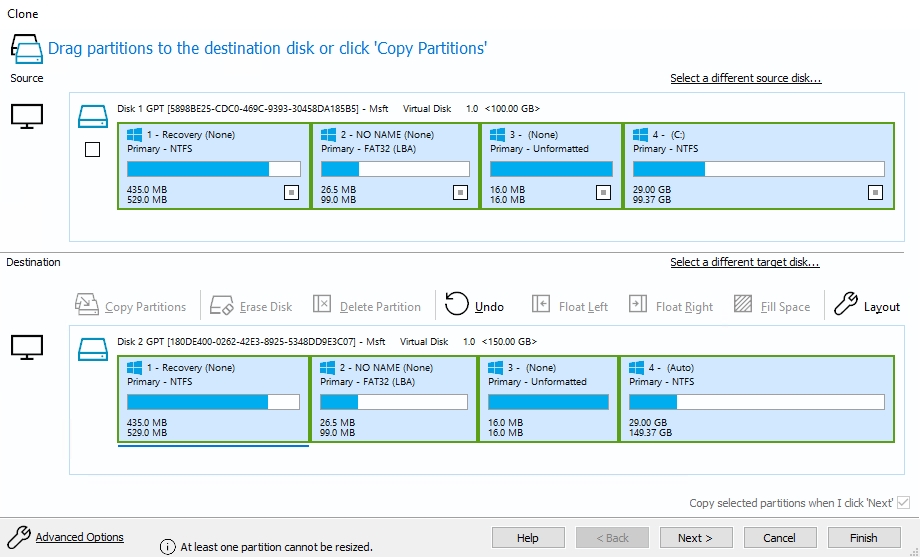
Step 3. Select the source and target M.2 disk
Inside the software, select your current system disk as the source and the new SSD as the target.
Step 4. Clone the entire disk (IMPORTANT)
When setting up the clone, make sure to copy the entire disk—not just the C: drive. This includes hidden partitions like EFI and recovery, which are required for the system to boot properly.
Step 5. Expand partitions to fill the target disk
Before starting the process, look for an option to expand or “fit” partitions to the target disk. This step is important: without it, a larger SSD may still show the old capacity after cloning.
Step 6. Start cloning
Once everything is set, start the cloning process. The time required depends on how much data you have and how fast your connection is (USB vs internal). It’s also normal for SSD temperatures to rise during this process, sometimes reaching around 50–60°C.
Step 7. Replace the SSD and Boot
When the clone is complete, shut down your computer and replace the old SSD with the new one. Power it back on and check that the system boots correctly. The first startup may take a little longer than usual, which is normal.
Step 8. Verify Everything Works
Finally, do a quick check: confirm that the full disk capacity is available, make sure Windows is still activated, and verify that your apps, like Microsoft Office, and your files are all intact.
What If You Only Have One M.2 Slot?
If your device has only one M.2 slot, as is the case with most laptops, you can still clone your SSD using a USB-to-M.2 enclosure. This allows you to connect the new drive externally and complete the cloning process without installing it internally first.
Step 1. Connect the new M.2 SSD
This can be a complicated process, and many non-technical people may feel stuck. Don’t worry, follow the guidance below to install the new or formatted SSD into the USB enclosure:
- Open the enclosure (usually by sliding the cover or removing a small screw)
- Don’t forget to place the thermal pad on the top of the SSD’s chips
- Insert the M.2 SSD into the slot at a slight angle (about 30°)
- Gently press the SSD down and secure it with the included screw or latch
- Close the enclosure
- Once the SSD is installed, connect the enclosure to your computer using the USB cable
- After plugging it in, check if the drive is recognized:
- Right-click the Start menu and open Disk Management
- Look for a new disk (it may show as “Unknown” or “Unallocated”)
- If you see the new SSD listed, it’s ready to be cloned.

Now, you can follow the steps of the previous part to clone one M.2 SSD to another with only a single slot. Here is a simplified workflow:
Step 2. Launch cloning software
Step 3. Select the source and target M.2 disk
Step 4. Clone the entire disk
Step 5. Expand partitions to fill the target disk
Step 6. Start cloning
Step 7. Replace the SSD and Boot
Step 8. Verify Everything Works
Common Problems and Fixes After Cloning M.2 SSD to Another
Even when the cloning process completes successfully, a few issues may appear the first time you boot or check the new drive. Most of them are easy to fix once you know what to look for.
1. Cloned SSD Won’t Boot
If your system doesn’t boot from the cloned SSD, start with the basics.
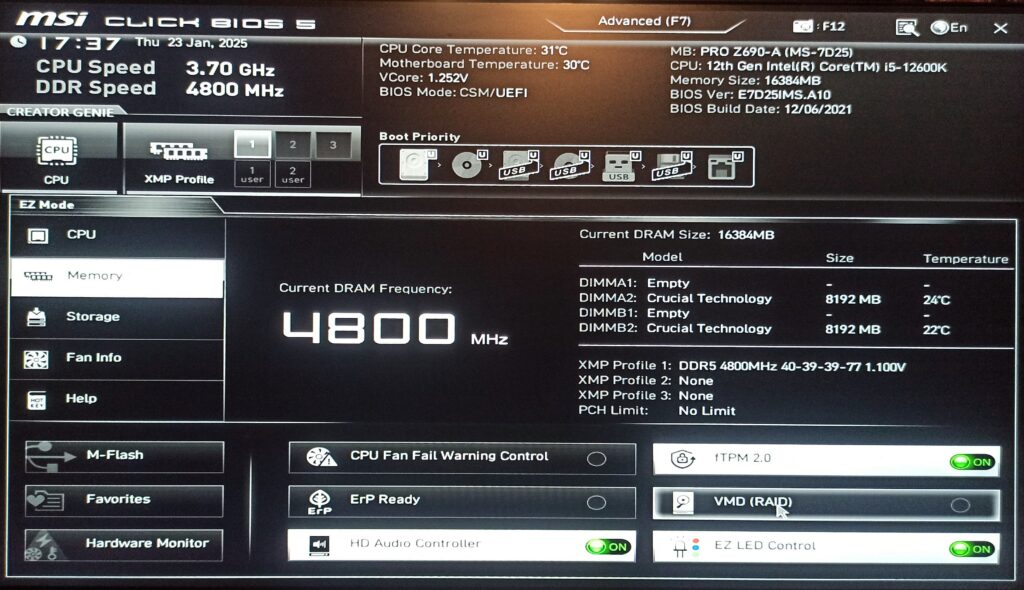
Enter BIOS/UEFI and make sure the new drive is set as the primary boot device.
If that looks correct, check whether your system is using UEFI or Legacy mode; this needs to match how Windows was originally installed.
In some cases, the issue comes from a missing or improperly cloned EFI partition. This usually happens if not all partitions were selected during the cloning process.
2. SSD Shows Wrong Size
If your new SSD shows the same capacity as the old one (for example, 500GB instead of 1TB or 2TB), it’s typically because the partitions weren’t expanded during the cloning process.
You can fix this in Disk Management:
- Right-click the main partition (usually C:)
- Select Extend Volume
- Allocate the remaining unallocated space
3. SSD Not Detected
If the new SSD doesn’t show up at all, it’s usually a connection issue.
Double-check that the SSD is properly seated (if internal) or that the USB enclosure is securely connected.
If the hardware looks fine, go into BIOS and confirm that the M.2 slot or NVMe support is enabled.
4. BitLocker Issues
If BitLocker (or device encryption) was enabled before cloning, it can cause boot or access problems on the new drive.
The safest approach is to disable encryption before cloning, then re-enable it once everything is working normally.
What to Do with Your Old M.2 SSD
Once you’ve successfully cloned your drive, your old M.2 SSD doesn’t have to sit unused. With a couple of quick steps, you can turn it into something useful again.
1. Turn It into an External Drive
The easiest option is to reuse it as a portable SSD. Just place the old drive into a USB to M.2 enclosure and connect it to your computer. You’ll get a high-speed external storage device that’s perfect for backups, file transfers, or even editing large files on the go.
2. Properly Wipe the Old SSD
Before reusing the drive, it’s a good idea to completely wipe it, especially since it still contains your old system and hidden partitions.
A simple format isn’t always enough, because system partitions may remain. Instead, you can use the Windows command line tool DiskPart to fully clean the drive:
- Open Command Prompt as administrator
- Type diskpart and press Enter
- Run list disk to identify your SSD
- Run select disk X (replace X with the correct disk number)
- Run clean to remove all partitions
This will erase everything on the drive, including hidden system partitions.
3. Reinitialize the SSD
After cleaning, the drive will appear as unallocated. Go to Disk Management and initialize it.
For most modern systems, choosing GPT (GUID Partition Table) is recommended. Once initialized, create a new volume, and the SSD is ready to use again.
FAQs About M.2 SSD Clone
1. How long does cloning an M.2 SSD take?
It depends on how much data you have and how fast your SSD and connection are. In most real-world cases, it can take anywhere from a few minutes to over an hour.
2. Will I lose data if I transfer data from an M.2 SSD to another?
No, cloning is designed to copy everything from your old drive to the new one. However, it’s still recommended to back up important files just in case something unexpected happens.
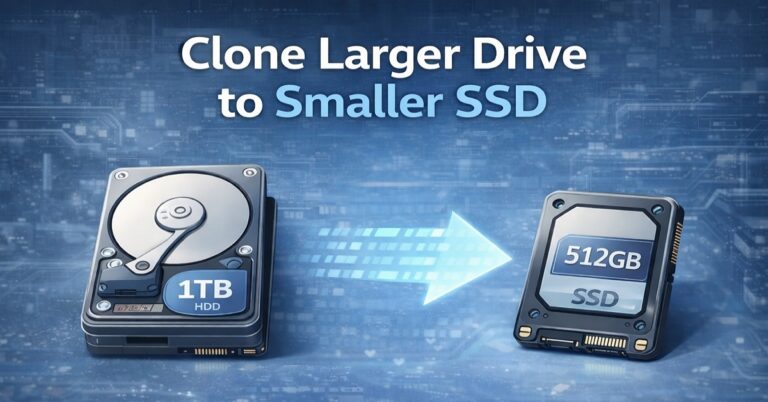
3. Can I clone a larger M.2 SSD to a smaller SSD?
Yes, but only if the data on your current drive fits within the smaller SSD’s capacity. Otherwise, the cloning process will fail or require you to remove some data first.
4. Do I need to reinstall Windows if I clone an M.2 SSD?
No. That’s the main advantage of cloning—you keep your existing Windows installation, along with your apps, settings, and files.
5. Is cloning safe?
Yes, cloning is generally safe as long as you follow the correct steps, especially selecting the right source and target disks. Most issues come from user mistakes, not the process itself.