Affiliate Disclosure: This post may include affiliate links. If you click and make a purchase, I may earn a small commission at no extra cost to you.
Updated your BIOS and now see a black screen? Don’t worry. BIOS updates are essential for system stability, but a failed or incompatible update can sometimes prevent your PC from booting. The good news? In many cases, your computer can be recovered without professional repair. This guide walks you through proven methods to fix a black screen after a BIOS update, step by step.
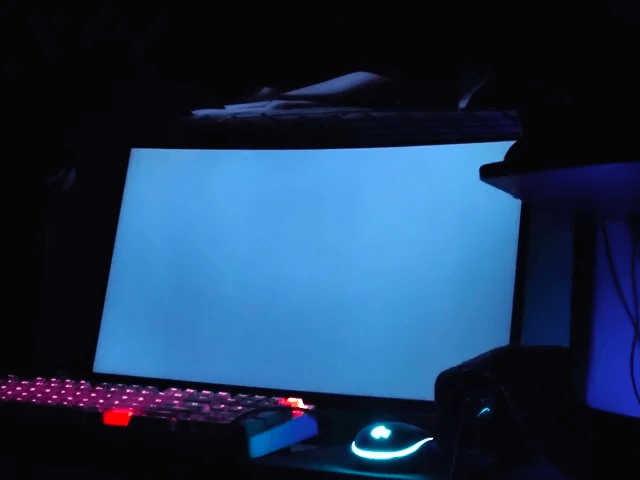
What Is the Black Screen After BIOS Update?
An Asus black screen after BIOS update, or with other brands, means the PC powers on but shows no display. It usually happens due to a failed or incompatible firmware update, an interrupted flashing process, or display settings resetting during the update. The system may still be running, but video output is missing. This does not always mean permanent damage; many cases can be recovered with BIOS recovery or a CMOS reset.
Why BIOS Update Can Cause a Black Screen
A BIOS update modifies low-level firmware that controls how your hardware initializes. If something goes wrong during this process, the system may fail before the display is activated, resulting in a black screen.
Because BIOS runs before the operating system, even a small firmware issue can prevent any image from appearing.
Common causes include:
- Interrupted update. Power loss or forced shutdown during flashing can corrupt the BIOS.
- Wrong BIOS version. Installing firmware not designed for your exact motherboard model.
- Corrupted BIOS file. Incomplete or damaged download.
- Reset display settings. Update switches from discrete GPU to integrated graphics (or vice versa).
- Hardware reinitialization failure. Memory or storage fails POST after firmware changes.
💡Read also: PC Won’t Boot to BIOS – 8 Fixes to Access BIOS Again
How to Fix Black Screen After BIOS Update (Step-by-Step)
If your computer shows a black screen after BIOS update, don’t panic. The key is to troubleshoot methodically, starting with the simplest checks and moving toward advanced recovery options. Follow the solutions below in order to maximize your chances of restoring your PC safely.
Way 1. Reset CMOS
Clearing CMOS restores the BIOS to its default settings, fixing misconfigured firmware parameters.
Steps (Desktop PC):
- Shut down and unplug the power cable.
- Hold the power button for 10–15 seconds to discharge residual power.
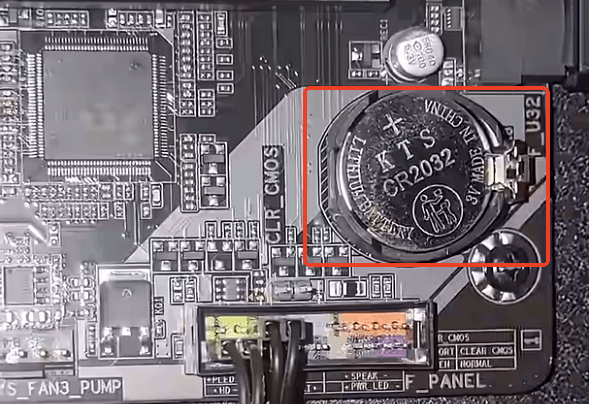
- Open the case and locate the CR2032 CMOS battery.
- Remove the battery for 5 minutes.
- Reinsert the battery and reconnect power.
- Turn the PC back on.
💡Alternative: Use the Clear CMOS jumper or rear-panel CMOS button if available.
Share this post to help more users solve black screen errors after bios update!
Way 2. Wait Before Panicking (X–20 minutes)
After a BIOS update, the motherboard may automatically retrain memory, rebuild hardware tables, or reconfigure firmware settings. This can take several minutes and may appear as a black screen.
Steps:
- Leave the computer powered on.
- Wait at least 10–20 minutes without pressing keys or powering off.
- Watch for signs of activity (fan speed changes, keyboard lights flashing).
- If nothing changes after 20 minutes, proceed to the next method.
💡Do not force shutdown too early, as this may worsen firmware corruption.
Way 3. Check Display Output and GPU Configuration
BIOS updates often reset display settings, switching from a dedicated GPU to integrated graphics (or vice versa). This resolves many cases where the system boots but outputs video to a different port.
Steps:
- Power off the PC completely.
- If using a dedicated GPU, move the display cable from the GPU port to the motherboard video output (HDMI/DP).
- If using integrated graphics, try connecting to the dedicated GPU instead.
- Test a different cable (HDMI/DisplayPort) or monitor.
- Power the system back on.
Way 4. Minimal Hardware Boot
A BIOS update may change memory compatibility or device initialization order. Reducing hardware helps isolate the fault.
Steps:
- Power off and unplug the system.
- Disconnect all storage drives (SSD/HDD).
- Remove dedicated GPU (if CPU has integrated graphics).
- Leave only:
- Motherboard
- CPU
- One RAM stick
- Power supply
- Connect the monitor and power it on.
- If successful, reconnect components one at a time.
Way 5. Use BIOS Recovery/FlashBack
If the BIOS firmware is corrupted, recovery tools can reflash it even without display output. Refer to your motherboard manual for exact naming and port requirements.
Steps (General USB BIOS FlashBack):
- Download the correct BIOS file from the motherboard manufacturer’s official website.
- Format a USB drive to FAT32.
- Rename the BIOS file according to the manufacturer’s instructions.
- Insert the USB into the dedicated BIOS FlashBack port.
- Press and hold the FlashBack button until the LED begins blinking.
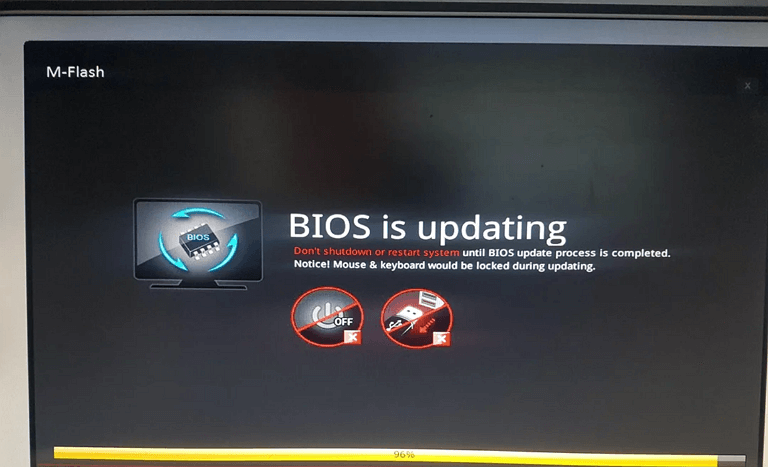
- Wait until flashing stops (do not interrupt power).
- Restart the system.

Way 6. Reflash or Roll Back BIOS
The new BIOS version may be incompatible or unstable for your hardware revision.
Steps:
- Download a previous stable BIOS version.
- Use BIOS FlashBack or recovery mode to install it.
- After successful flashing, load Optimized Defaults in BIOS.
- Save and reboot.
💡If none of these methods solves the black screen after BIOS update issue, the BIOS chip may be corrupted beyond recovery, and professional repair or motherboard replacement may be required.
Brand-Specific BIOS Recovery Guide (Optional but Powerful)
If general troubleshooting does not fix the black screen after BIOS update, your next step is to use the manufacturer’s built-in BIOS recovery feature. Many modern motherboards and laptops include emergency firmware recovery tools that work even when no display appears. Below are brand-specific recovery methods for major manufacturers.
ASUS – USB BIOS FlashBack
Best for: Desktop motherboards with a dedicated FlashBack button.
Steps:
- Download the correct BIOS file from the official ASUS Support website.
- Format a USB drive to FAT32.
- Use the ASUS BIOS Renamer tool (if required) to rename the file properly.
- Copy the BIOS file to the root directory of the USB drive.
- Insert the USB into the dedicated BIOS FlashBack USB port (usually labeled).
- Press and hold the BIOS FlashBack button for 3 seconds until the LED starts blinking.
- Wait until the LED stops blinking (do not cut power).
- Power on the system.
This method works even without a CPU, RAM, or GPU installed on many ASUS boards.
MSI – Flash BIOS Button
Best for: MSI motherboards with Flash BIOS support.
Steps:
- Download the BIOS file from the official MSI Support page.
- Format a USB drive to FAT32.
- Rename the BIOS file to MSI.ROM (confirm in manual).
- Insert the USB into the dedicated Flash BIOS USB port.
- Press the Flash BIOS button.
- Wait until the LED flashing process completes.
- Restart the system.
Do not interrupt power during flashing.
Gigabyte – Q-Flash Plus
Best for: Gigabyte boards with the Q-Flash Plus feature.
Steps:
- Download the correct BIOS version from Gigabyte Support.
- Format the USB to FAT32.
- Rename the BIOS file to GIGABYTE.bin (check your model manual).
- Insert into the white-labeled Q-Flash Plus USB port.
- Press the Q-Flash Plus button.
- Wait for the LED to finish blinking.
- Power on the system.
Q-Flash Plus allows BIOS recovery without entering the BIOS menu.
Dell – BIOS Recovery (Laptop & Desktop)
Best for: Dell laptops showing a black screen after an update.
Steps:
- Power off the system.
- Press and hold Ctrl + Esc.
- While holding the keys, plug in the AC power and press the Power button.
- Release keys when the BIOS Recovery screen appears.
- Choose Recover BIOS and follow the on-screen instructions.
If recovery does not start, create a Dell BIOS recovery USB from another PC.
HP – BIOS Emergency Recovery
Best for: HP laptops that fail after BIOS update.
Steps:
- Turn off the laptop.
- Press and hold Windows + B (or Windows + V on some models).
- While holding the keys, press and hold the Power button for 2–3 seconds.
- Release the Power button, but keep holding the keys.
- Wait for the BIOS recovery screen or beeping sequence.
- Follow recovery instructions.
HP systems often automatically search for a recovery image.
Important Notes Before Attempting Brand Recovery
- Always download BIOS files from the official manufacturer’s website.
- Confirm your exact motherboard or laptop model number.
- Use a stable power source (avoid power strips if possible).
- Never interrupt BIOS flashing once started.
If brand-specific recovery fails, the BIOS chip may need to be reprogrammed with an external programmer or the motherboard replaced.
Common Mistakes to Avoid
When dealing with a black screen after a BIOS update, the wrong action can make recovery harder. Taking a calm, step-by-step approach significantly increases the chances of successful recovery.
Avoid these common mistakes:
1. Forcing a shutdown too quickly
After a BIOS update, the system may take several minutes to reinitialize hardware. Powering off too early can corrupt the firmware further.
2. Interrupting a BIOS recovery process
Never unplug the system or remove the USB drive while BIOS FlashBack or recovery is running. This can permanently damage the BIOS.
3. Using the wrong BIOS file
Installing firmware for a different motherboard revision or model can cause boot failure. Always verify the exact model number.
4. Skipping CMOS reset
Many users overlook clearing CMOS, even though incorrect BIOS settings often cause black screens.
5. Repeatedly flashing multiple versions randomly
Flashing different BIOS versions without a clear plan increases risk. Stick to one verified, stable version.6.
6. Ignoring hardware isolation
Failing to test with minimal hardware (one RAM stick, no drives, basic configuration) may hide the real issue.