Affiliate Disclosure: This post may include affiliate links. If you click and make a purchase, I may earn a small commission at no extra cost to you.
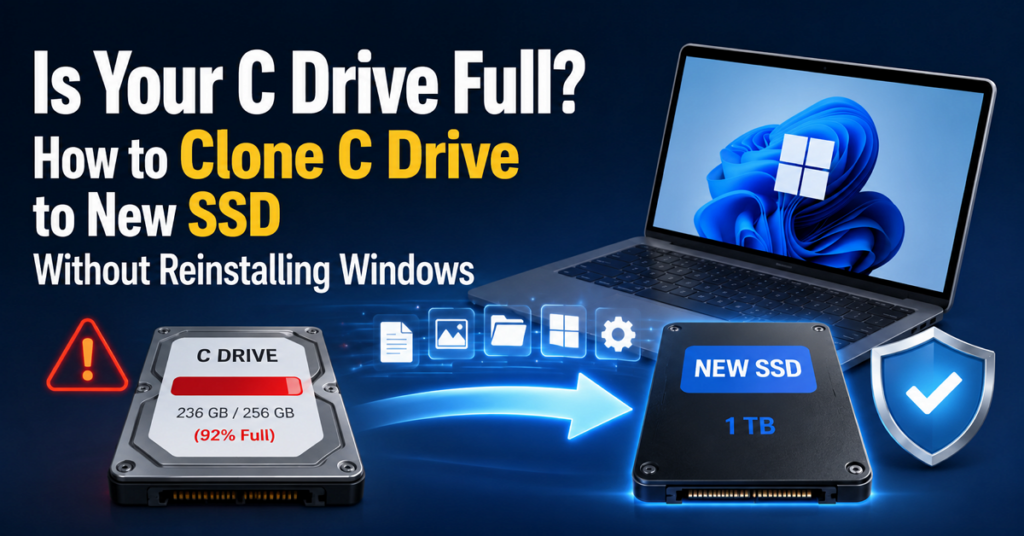
A full C drive is one of the most common problems Windows users face. As applications grow larger and Windows updates consume more storage, even a 256GB SSD can quickly run out of space. When that happens, your computer may become slower, updates may fail to install, and you’ll constantly see low-disk-space warnings.
The good news is that you don’t need to reinstall Windows to solve the problem. Instead, you can clone your existing system drive to a larger disk and continue using your PC exactly as before.
Whether you’re looking to move Windows to a larger SSD, replace a failing system drive, or simply upgrade to a faster NVMe drive, disk cloning provides a convenient solution. In this guide, you’ll learn how to clone a C drive without reinstalling Windows, avoid common mistakes, and ensure your new SSD boots successfully after migration.
Why Most People Clone a C Drive Instead of Reinstalling Windows
Years ago, upgrading a storage drive usually meant performing a fresh WindowsOS installation. While that approach still works, it comes with significant drawbacks. A clean installation requires you to reinstall Windows, download drivers, reinstall applications, restore personal files, and reconfigure settings and preferences. Depending on the software you use and data you own, this process can take several hours, or even an entire day.
Cloning eliminates most of that work. When you clone a drive, the cloning software creates an exact copy of your current system, including Windows operating system, installed applications, user accounts, documents and personal files, boot information and system partitions. Once the cloning process is complete, you can simply boot from the new SSD and continue working normally.
This is why many users searching for How to Clone C Drive to SSD, or How to Clone C Drive to Larger SSD choose cloning over a clean installation. It saves time, reduces risk, and preserves your existing setup.
Before You Clone: Check These 4 Things First
Before starting the cloning process, there are several important checks that can help prevent migration issues later.
1. Verify the New SSD Has Enough Capacity
The destination SSD must have enough available space to store all the data currently located on the source drive. For example:
- Used space on current drive: 180GB
- New SSD capacity: 500GB
If you’re researching How to Clone C Drive to Larger SSD, you’ll typically have plenty of extra space available after migration. Many cloning tools can automatically expand partitions to utilize the additional capacity. Learn how to Clone 1TB HDD to 500GB SSD Without Losing Data.
2. Make Sure Computer Detects the New SSD
Before launching cloning software, confirm that the new drive appears in Disk Management. Depending on your hardware, you may need:
- A USB-to-SATA adapter
- An NVMe enclosure
- An external docking station
If Windows cannot see the new drive, cloning software won’t be able to access it either.
3. Check BitLocker and Partition Style
Modern Windows 11 systems generally use GPT partitioning and UEFI boot mode. If BitLocker encryption is enabled:
- 1. Suspend BitLocker protection.
- 2. Perform the cloning process.
- 3. Re-enable BitLocker afterward.
This simple step helps reduce the risk of post-cloning boot complications.
4. Choose a Disk Cloning Tool
One of the necessary tool required while cloning C drive is a disk cloning software. There are many disk cloning utilities out there, the free tools including Clonezilla, Rescuezilla, Hasleo Disk Clone, and paid tools including EaseUS Disk Copy, Acronis True Image, Macrium Reflect, etc. Choose one based on your need. You can also refer to the following post to pick one.
The Fastest Way to Clone a C Drive to a New SSD
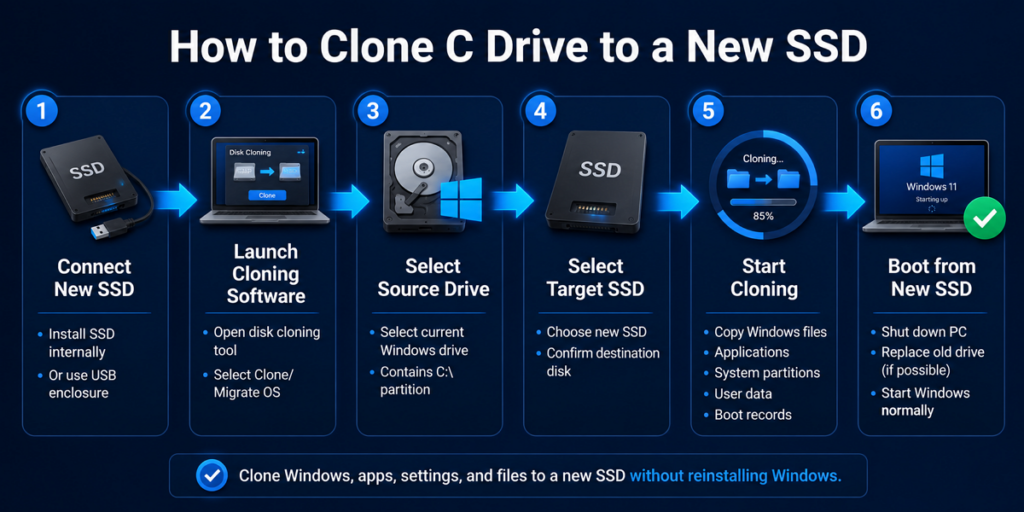
The exact steps vary depending on the software you use, but the overall workflow remains largely the same.
Step 1. Connect the New SSD – Install the new SSD internally or connect it through a compatible enclosure.
Step 2. Launch Disk Cloning Software – Open your preferred cloning application and select the disk cloning or system migration feature.
Step 3. Select the Source Drive – Choose the drive that currently contains Windows and your C partition.
Step 4. Select the Target SSD – Choose the new SSD as the destination.
Step 5. Start the Cloning Process – The software will copy:
- Windows files
- Applications
- System partitions
- User data
- Boot records
Step 6. Boot from the New SSD
After cloning completes, shut down the computer, disconnect the old drive if possible. Then install the new SSD, and start the PC. Windows should load normally without requiring reinstallation.
The same process applies if you’re researching How to Clone C Drive to NVMe SSD. The primary difference is that your target drive uses an NVMe interface instead of SATA.
What Happens After Cloning? (And Why Some PCs Won’t Boot)
Many users assume the migration is finished once the cloning progress reaches 100%. In reality, the most important step occurs during the first boot. A successful clone should allow Windows to:
- Start normally
- Load installed applications
- Preserve user settings
- Retain all files and documents
However, one common issue reported online is: Cloned C Drive Won’t Boot
This problem can occur for several reasons.
- Incorrect Boot Order – The motherboard may still attempt to boot from the original drive.
Solution: Enter BIOS and set the new SSD as the first boot device.
- Missing EFI Partition – Some cloning methods only copy the visible C partition and ignore hidden boot partitions. Without the EFI System Partition, Windows cannot start correctly.
- UEFI and Legacy Mode Conflicts – If the motherboard’s boot mode doesn’t match the cloned drive configuration, startup failures can occur.
- Both Drives Remain Connected – Keeping two identical Windows installations connected simultaneously can occasionally confuse the boot manager.
Solution: Disconnecting the old drive often resolves the issue immediately.
Can You Clone Only the C Drive?
Technically, the answer is both yes and no.
While the C partition contains Windows itself, modern Windows installations also rely on several hidden partitions, including:
- EFI System Partition
- Microsoft Reserved Partition
- Recovery Partition
These partitions contain critical boot files and recovery information.
If you clone only the visible C partition and ignore these supporting partitions, the new drive may not boot properly.
For this reason, when users ask Can You Clone Only the C Drive, the safest recommendation is to clone the entire system disk.
Some advanced migration tools, like EaseUS Disk Copy, can automatically identify and copy only the partitions required for Windows to function. In those situations, the process may appear to clone only the C drive while actually transferring all essential boot components behind the scenes.
Clone vs Clean Install: Which Makes More Sense in 2026?
Both approaches can move Windows to a new SSD, but they serve different purposes.
| Factor | Cloning | Clean Install |
| Time Required | Fast | Slow |
| Keep Applications | ✅ | ❌ |
| Keep Settings | ✅ | ❌ |
| Reinstall Drivers | ❌ | ✅ |
| Fix Existing Windows Problems | Limited | Excellent |
| Ease of Use | Easy | Moderate |
Cloning is typically the better option when:
- Upgrading storage capacity
- Moving Windows to a larger SSD
- Replacing an aging SSD
- Attempting to replace a failing system drive
- Migrating Windows to newer hardware
- Avoiding software reinstallation
A clean installation may be preferable if:
- Windows is severely corrupted
- Malware infections exist
- You want a completely fresh operating system environment
For most users in 2026, cloning remains the faster and more practical choice.
Final Words
Cloning the C drive to a new SSD is particularly attractive because it lets you move Windows to a larger SSD without losing programs, settings, or personal files. Similarly, users replacing a failing system drive can often complete the migration before the old drive fails completely.
Another growing trend is migrating Windows to NVMe SSD storage. Compared with older SATA SSDs, NVMe drives deliver significantly faster read and write speeds, making them an appealing upgrade path for both desktop and laptop users.
If you’re specifically researching how to clone the C Drive to an NVMe SSD, the migration workflow is nearly identical to standard SSD to new SSD cloning. The only additional requirement is ensuring that your motherboard supports booting from NVMe devices.
Ultimately, cloning offers the best balance of convenience, speed, and reliability for most Windows users. Unless you’re intentionally seeking a fresh start, learning how to clone a C drive without reinstalling Windows is usually the smartest way to upgrade your storage while preserving your existing setup.