Affiliate Disclosure: This post may include affiliate links. If you click and make a purchase, I may earn a small commission at no extra cost to you.
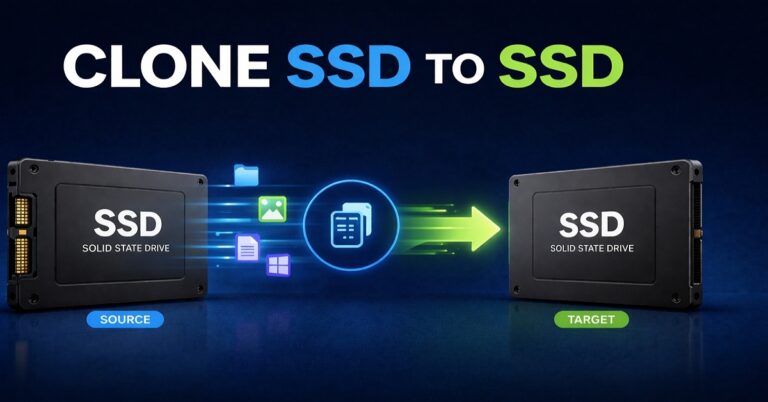
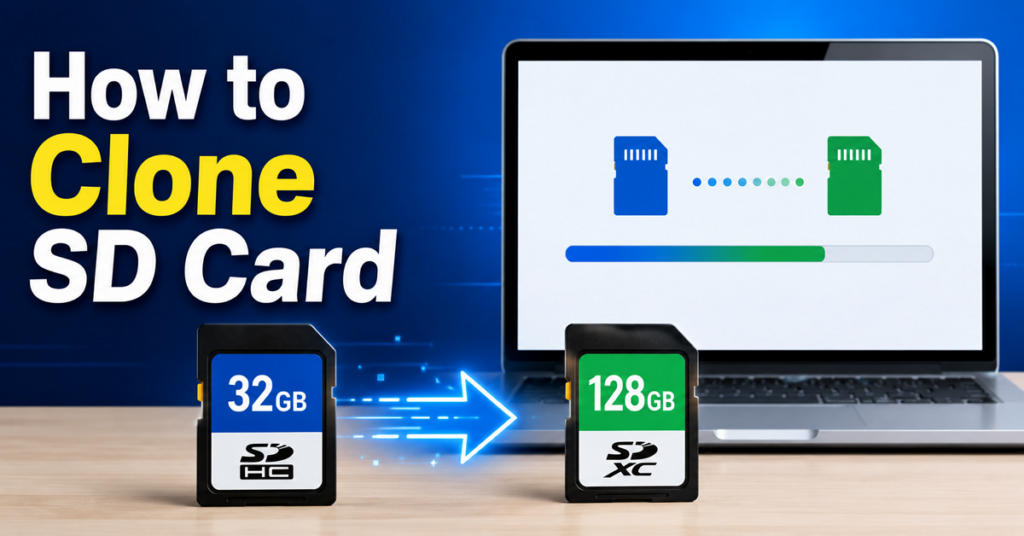
Cloning an SD card allows you to create an exact copy of your existing memory card, including files, system data, partitions, and boot information. It is commonly used when upgrading to a larger SD card, backing up important data, or migrating systems such as Raspberry Pi OS. In this guide, you will learn how to clone SD card step by step, along with the best tools and troubleshooting tips.
Quick Answer: How to Clone an SD Card?
To clone an SD card, use disk cloning software to create a sector-by-sector copy of your original SD card and write it to another card.
- Insert the source and target SD cards into your computer
- Open SD card cloning software
- Select the source SD card
- Select the target SD card
- Start the cloning process
- Wait for completion and verify the new SD card
This process creates an identical copy, including bootable data.
What Does It Mean to Clone an SD Card?
SD card cloning is the process of creating an exact digital replica of a memory card at the disk level, rather than copying individual files.
Unlike simple drag-and-drop file transfer, SD card cloning includes:
- Boot partitions
- Hidden system files
- File allocation tables
- Operating system data
- Device configuration files
This makes it essential for users working with:
- Raspberry Pi systems
- Dash cams
- Security cameras
- Embedded Linux devices
- Gaming handheld consoles
SD Card Copy vs Image Backup vs Clone
| Method | Bootable | Copies System Data | Best Use Case |
|---|---|---|---|
| Copy & Paste | ❌ | ❌ | File transfer |
| Disk Image Backup | ✅ | ✅ | Backup & recovery |
| SD Card Cloning | ✅ | ✅ | Upgrade & migration |
Clone SD card when:
- Upgrading SD card
- Migrating OS
- Bootable device duplication
Image Backup SD when:
- Long-term storage
- Disaster recovery
- Multiple restores
What You Need Before Cloning an SD Card
Before cloning an SD card, ensure you have the original SD card, a target SD card (same size or larger), an SD card reader, and disk cloning software. Crucially, back up any data on the destination card, as cloning permanently erases it.
➡️Essential Hardware
- The Original SD Card: The source card containing the data, OS, or partitions you want to duplicate.
- A Target SD Card: A new, high-quality SD card (e.g., from manufacturers like SanDisk or Samsung). It must be the exact same storage capacity or larger.
- SD Card Reader(s): Hardware to connect both SD cards to your computer simultaneously. This can be a dual-slot reader or 2 separate USB card readers.
➡️Essential Software
- Disk-Cloning Tool: You need software to make a byte-for-byte copy, which is required for bootable drives or hidden partitions. Reliable options include Win32 Disk Imager, Raspberry Pi Imager, EaseUS Disk Copy, or DiskGenius.
How to Clone an SD Card on Windows 11/10/8/7
There are several ways to clone an SD card on a Windows PC. The best method depends on your technical experience and specific requirements. Below, we’ll walk through three popular SD card cloning tools, ranging from free imaging utilities to professional disk cloning software.
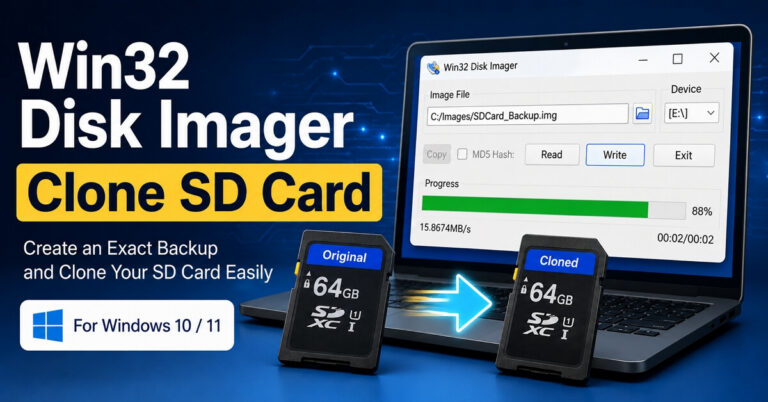
Method 1. Clone SD Card with Win32diskimager
If you simply need to create an exact image backup of an SD card and restore it later, Win32 Disk Imager is a reliable and lightweight option. It’s especially popular among Raspberry Pi users for backing up and flashing SD card images.
Step 1. Connect the Source SD Card
Insert the SD card you want to clone into your Windows PC using an SD card reader.
Step 2. Launch Win32 Disk Imager
Open Win32 Disk Imager and select a location on your computer to save the image file.
Step 3. Create an SD Card Image
- Select the source SD card from the Device drop-down menu.
- Click the folder icon and specify a file name for the image.
- Click Read.
- Wait for the software to create an image file of the SD card.
Step 4. Insert the Target SD Card
Remove the source SD card and insert the destination SD card. Make sure its capacity is equal to or larger than the original card.
Step 5. Write the Image to the New SD Card
- Select the image file you created.
- Choose the target SD card.
- Click Write.
- Confirm the warning message and wait for the cloning process to finish.
Step 6. Verify the Cloned SD Card
Safely eject the card and reconnect it to ensure all files and partitions have been copied successfully.
Method 2. Clone SD Card with Disk Cloning Software
While Win32 Disk Imager can create and restore SD card images, it lacks advanced features such as partition resizing and direct disk-to-disk cloning. If you’re looking for a more flexible and beginner-friendly solution, professional cloning software may be a better choice. Here, we’ll use EaseUS Disk Copy as an example to show you how to clone SD card with multiple partitions.
Step 1. Connect Both SD Cards
- Connect the source and target SD cards to your computer using card readers.
Step 2. Launch EaseUS Disk Copy
- Open EaseUS Disk Copy and select Disk Mode from the main interface.
Step 3. Select the Source SD Card
- Select the SD card you want to clone, then click Next.
Step 4. Select the Destination SD Card
- Select the target SD card, then click Next.
Step 5. Adjust Disk Layout (Optional)
- If the destination card is larger, you can resize partitions or select “auto-fit the disk” to utilize the additional storage space.
Step 6. Start Cloning
- Click Proceed to start the cloning process.
- Wait until the operation is completed.
Step 7. Check the Cloned Card
- Safely remove the target SD card and test it on your device to confirm it boots and functions properly.
Method 3. Clone SD Card with Raspberry Pi Imager
If you’re working with a Raspberry Pi, you can also use Raspberry Pi Imager to create backups and duplicate SD cards. The tool is free, easy to use, and available for Windows, macOS, and Linux, making it a convenient option for Raspberry Pi enthusiasts.
This is a video about how to clone an SD card using Raspberry Pi Imager.
Here is an official document about how to use Raspberry Pi Imager.
After learning these 3 methods, you may still wonder which tool is the best choice. The answer depends on your needs. Win32 Disk Imager and Raspberry Pi Imager are great for creating image backups, while EaseUS Disk Copy offers a more streamlined cloning experience with additional features, including partition adjustment and direct disk cloning.
Best SD Card Cloning Tools Recommendation
| Tool | Best For | OS Support | Skill Level | Boot Support | Partition Resize |
|---|---|---|---|---|---|
| EaseUS Disk Copy | Beginners | Windows | Easy | Yes | Yes |
| DiskGenius | Advanced users | Windows | Medium | Yes | Yes |
| Win32 Disk Imager | Raspberry Pi Users | Windows | Easy | Yes | No |
| Clonezilla | IT deployment | Windows, Linux, macOS | Hard | Yes | Limited |
| dd command | Linux Power Users | Windows, Linux, macOS | Hard | Yes | No |
| Disk Utility | Mac users | macOS | Easy | Yes | Limited |
| Raspberry Pi Imager | Raspberry Pi Beginners | Windows, macOS, Linux | Easy | Yes | No |
- EaseUS Disk Copy: A user-friendly disk cloning solution that lets users clone SD cards, HDDs, and SSDs with minimal effort. Its intuitive interface makes it ideal for backups, upgrades, and migrating data between storage devices.
- DiskGenius: A comprehensive disk management and cloning tool that combines disk imaging, partition management, data recovery, and migration features. It is well-suited for users who need advanced control over storage devices.
- Win32 Disk Imager: A lightweight imaging utility commonly used to create and restore SD card images, especially for Raspberry Pi and other embedded systems. It focuses on simple image writing and backup tasks.
- Clonezilla: An open-source disk cloning and deployment platform that can clone entire drives and partitions. It is widely used in enterprise environments for system deployment and mass provisioning.
- dd Command: A built-in Linux and Unix command-line utility that performs sector-by-sector copying of disks and partitions. It provides precise control and is popular among developers and system administrators.
- Disk Utility: Apple’s native disk management application that enables Mac users to create, restore, and manage disk images without installing third-party software.
- Raspberry Pi Imager: The official Raspberry Pi imaging tool for downloading and writing operating systems directly to SD cards. It simplifies the setup process for Raspberry Pi projects.
Common SD Card Cloning Problems
Although cloning an SD card is usually straightforward, problems can occur during or after the cloning process. Here are the most common issues and how to resolve them.
Problem 1. Cloned SD Card Won’t Boot
Possible Causes
- Files were copied manually instead of performing a disk clone.
- The boot sector was not copied.
- The cloning software skipped hidden system partitions.
Solutions
- Use the sector-by-sector cloning method.
- Clone the entire SD card instead of copying files manually.
- Verify that all partitions, including boot partitions, were cloned successfully.
Problem 2. The New SD Card Shows Less Capacity
Possible Causes
- The original partition layout was copied exactly.
- Unallocated space was left unused after cloning to a larger SD card.
Solutions
- Open Windows Disk Management.
- Extend the main partition into the unallocated space.
- Use cloning software that supports automatic partition resizing.
Problem 3. SD Card Clone Fails Midway
Possible Causes
- Bad sectors on the source card.
- Unstable USB card reader connection.
- Low-quality or counterfeit SD card.
Solutions
- Try a different USB port or card reader.
- Run a disk check to identify errors.
- Create an image file first, then restore it to the new card.
- Replace the SD card if hardware damage is detected.
Problem 4. The Target SD Card Is Not Recognized
Possible Causes
- File system corruption.
- Driver issues in Windows.
- Incompatible SD card reader.
Solutions
- Reconnect the card using another reader.
- Update storage device drivers.
- Check whether the card appears in Disk Management.
- Reformat the card if necessary.
Problem 5. Raspberry Pi Shows Black Screen After Cloning
Possible Causes
- Corrupted boot partition.
- Incomplete image creation.
- The clone process missed hidden Linux partitions.
Solutions
- Use Raspberry Pi Imager or a sector-level cloning tool.
- Recreate the image from the original SD card.
- Verify that the target card is greater than or equal to the source card.
Conclusion
Cloning an SD card is the most reliable way to upgrade, back up, or duplicate your storage without reinstalling systems or losing data. Whether you’re using Windows, Mac, or Linux, the process is simple with the right tool. If you want the safest method, use dedicated cloning software instead of manual file copying.
Hope this article helps!